Showing posts with label Basics. Show all posts

Friday, October 19, 2012

Da Capo

Chapter 89
Hello, Average Guys! As you know, I try to maintain a certain kind of balance here at Dress Like a Grownup!, and keep a few different kinds of plates spinning at once. Some plates are the equivalent of a doctoral degree, continuing education for lifelong dandies, all the way down to some plates that are Dressing 101, core curriculum for the freshman youth. After some time in the more advanced topics, like our recent History of Neckwear series, I like to go back and spend some time at the basics, for the benefit of Average Guys like yourself who are just starting along your mature sartorial journey. 

Of all the changes that need to be made, to cast off the shackles of the children's clothes you currently wear, and make a neat transition to the attire of adults, some are easier than others. The most difficult transition, is to that of a proper hat. 

This is understandable. The transformation of the core of your attire, trousers and shirts, is merely a shift in style from your current jeans and tee-shirts; as is the addition of a jacket. The metamorphosis from sneakers to proper shoes is likewise largely a shift of style: after all, you have always worn shoes of some sort: you are merely aiming to shift its nature. In other words, you are modifying your current articles of clothing to different, but related, articles. 

Not so the hat. For many, the inclusion of a hat is ex nihilo; the addition of an article that is totally new, and at first very strange. It is impossible to ignore a hat: it is always there, an unfamiliar pressure around your skull, an unfamiliar weight on your head, an unfamiliar sight at the periphery of your vision. You feel uncomfortable, and awkward, and uncertain; and your behavior will reflect that. And as you know, your attitude toward what you wear is just as important as the articles themselves -- if you feel awkward wearing a hat, others will feel awkward for you wearing a hat.

And yet, there are millions upon millions of Average Guys who think nothing of wearing a baseball cap. The odd little beanie-with-a-bill has become completely ubiquitous. But, just because everyone does something, doesn't mean it's right. If you're playing baseball, that's just fine -- wear a baseball cap. If you're not, don't -- wear a proper hat instead.

Fortunately, there IS a way for an Average Guy to transition into a proper hat easily and gently, without the jarring impact of the Sudden Fedora. If you are currently one of those fellows who does wear a baseball hat everywhere, this transition will be completely painless and very natural. If you have never worn a hat at all, it can be nearly an unnoticeable transition, for this particular sort of hat is actually very closely related to the baseball cap. 

I refer, of course, to the flat cap; also called the driver's cap, newsboy cap, taxi cap, dai cap, golf cap, ivy cap, or scally cap. They all refer to basically the same thing: low, wedge-shaped, with a visor in front instead of a brim all 'round.

They are universally worn, breaking boundaries of class, age, and nationality. In practice, they feel very much like the baseball cap with which you are familiar: snug around the circumference, sitting lightly upon the crown of the head, a brim over the eyes, the ears out in the open. Traditionally a sporty sort of outdoor hat, they can be worn pretty much anywhere today. If you are reticent about wearing a trilby or fedora until you get used to the idea, the flat cap is the ideal way for the Average Guy to break into the World of the Hatted.

The flat cap can trace its ancestry to the Tudor period. Tom Ring's 1566 Portrait of a Man wears a simply constructed cap.

The Tudor cap developed into to the widely-used military cap. They were constructed like this mau cap: rectangular front and back panels, a circular crown, and a demilune-shaped brim. The height of the front panel and the width of the brim were the same, so if the front panel was brought down and attached to the brim...
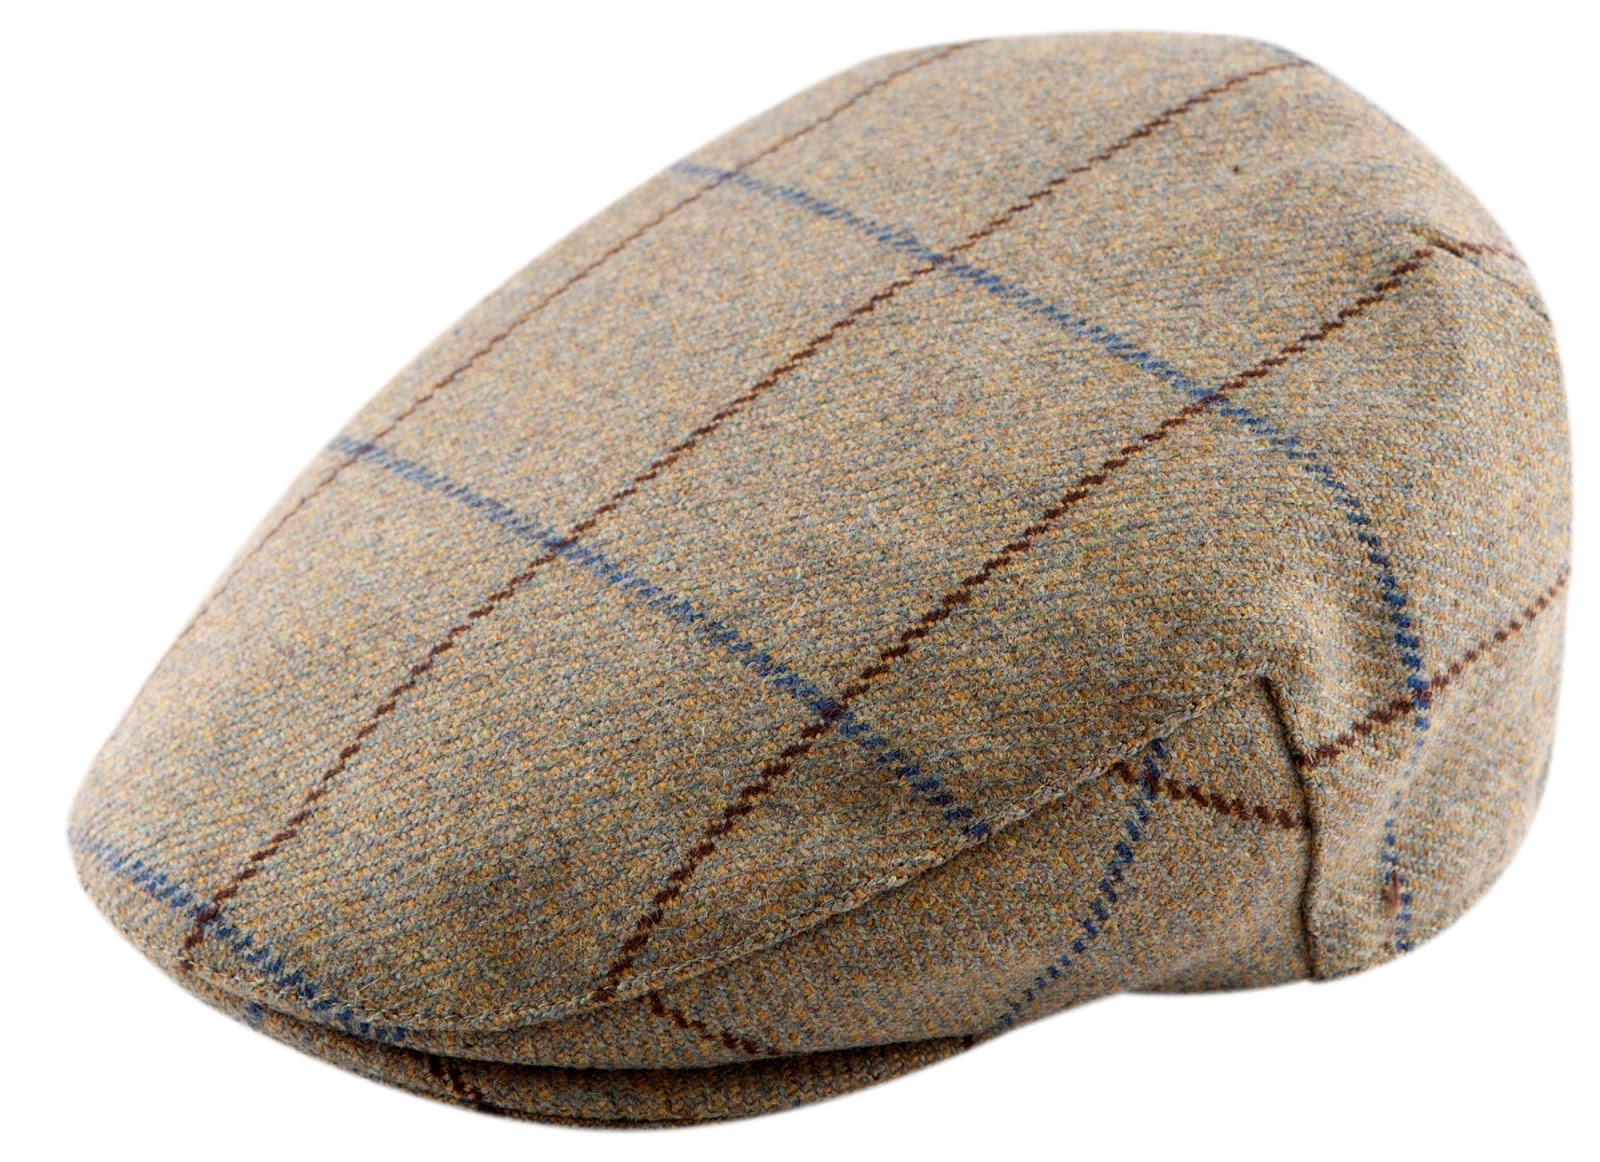
...the result was the distinctive wedge-shape of the flat cap. Notice the front panel remains, but the back panel is now in one piece with the crown. Many flat caps are made like this, but there are many variations. They are made from just about any fabric imaginable: cotton, tweed, felt, wool...even leather. One benefit of this type of cap is that it can be folded flat and put in a jacket pocket.

For cold weather, flat caps can have ear flaps for warmth; either tucked up inside or tied over the top when not in use.

Some flat caps are made of one piece of shaped and stretched fabric. As a rule, the smoother and plainer, with fewer seams a cap has, the more dressy it looks; since it takes more work to form the shape than just sewing panels together.


The ultimate expression of this is the ascot cap. They are in appearance like a flat cap, but shaped and blocked on a form like a fedora, with no seams. They are made of felt, and quite stiff.


There is another breed of flat cap, that is not derived from the Tudor military cap. It comes from another Tudor hat, like this one painted by Raphael in 1506 of Angelo Doni. It is made of pie-shaped wedges sewn together, with a drawstring around the circumference. It survives today virtually unchanged, in the form of the doctoral cap of academic regalia.

From it we get the eight quarter cap. Less wedge-shaped than the one-panel cap, the eight pieces that form the crown are topped by a button. You can see the resemblance to the baseball cap immediately.

The six quarter cap is identically constructed to the 8/4 cap, but with two fewer pieces for a slightly more streamlined profile.

The five panel cap is a hybrid of the two styles -- the front half is made with a half-circle crown and a front panel, the back half is made with pie wedges like an 8/4! 


There is a flat cap for every taste, and the shape and feel is similar enough to its cousin the baseball cap, that the Average Guy who finds himself hat-shy can slip into proper headwear without a second thought about it. After a time in a flat cap, with which you can practice proper hatiquette, you can decide to expand your horizons with a fedora or a trilby, or not. Many gents are content to spend their entire lives in a flat cap.

Click here to go to the next essay chronologically.

Click here to go back to the previous essay chronologically.

Click here to go back to the beginning.


Friday, August 3, 2012

The Need for Tweed

Chapter 78
This week: a clarification of one of the tenets of dressing well, by way of some handy examples. In a recent installment, I emphasized the importance of "tone matching." The Average Guy who desires to dress like a grownup may have a bit of trouble with this concept, if he is not properly introduced to it.

The Average Guy's  knowledge of "matching clothes" usually comes from the observation of his mother. Women are voracious matchers, as a rule. It has been beaten into girls from a very young age that every article of clothing worn must have at least one precisely-matching color amongst them; including shoes, jewelry, accessories, even cosmetics. There are further rules as to what colors and patterns "should" and "should not" be worn together.

It stands to reason that a young lad, barring any specific male tutelage, will adopt the aforementioned rationale as a universal maxim. Unfortunately, the history of menswear bears out that the concept of "matching" is vastly different among men than it is with the Fairer Sex. The difference is this: women match their clothing to itself. Men match their clothing to their environment. The reasoning is simple: historically, women worked largely in the home, and men worked largely outside. When you are tracking a mobile protein source, you don't want to stand out.

In other words, suits are camouflage. In today's world, where many men don't set foot outside at all, this may be a puzzling concept for some. If you agree with Poirot when he says, "If the outdoors are so good, Hastings, why did they invent indoors?" then you may have particular trouble with the idea.

Fortunately, there is a simple exercise which will make the whole concept crystal clear: we must turn our attention to Scotland, and its national fabric of tweed.

If you have spent any time at all in a secondhand shop hunting for suitable jackets in your quest for adulthood, you have run across tweed jackets. In addition to the grey or tan plain twills and herringbones, you have probably seen plaids and checks that to your untrained eyes looked strangely garish; yellows and blues and reds all together.

In order to make sense of it all, one merely has to look at the colors of the heaths, heathers, and glens of Bonnie Scotland. You may not think that plaids and checks of red and green can be camouflage; but observe!

For instance, take this hillside...
...and compare its rusts, greys, and browns to this example of tweed.
Let's take another example of a Scottish hill, this one in tan and brown and grey-blues:
And again, compare the tones and colors to this dogtooth check.
Let's give another example, this time a foggy blue-grey with lush greens:
And one more:

As you can imagine, this is no mere co-incidence. Wealthy landowners chose "estate tweeds," that were unique to that location. The man of the house would stand upon his balcony, and send his employees out, each with a different bolt of fabric across his shoulders. As they walked away and up the hill, the cloth that most closely matched the colors of the landscape would disappear from view first on the hillside, and that bolt would be chosen as the tweed for that estate.

In other words, "tone matching." Of course, it's impossible to choose your clothes in such a manner today...but the idea of matching your clothes to your environment is a timeless and valid one. This is, in fact, the very essence of the division between "town wear" and "city wear." Cities are dominated by greys, charcoals, and blacks, clean lines, and smooth textures; thus, that became the "city suiting." Likewise, when out of the city, look around you --take a picture if it will help-- and pull those colors into your outfits. Keep track of the changing of the seasons, and continually adjust your colors accordingly.

Of course, you needn't try to combine every hue in one item. Unless you get very lucky with a secondhand estate tweed, your jacket, shirt, and trousers can capture single hues in broad strokes, and your accessories can add the stronger ancillary colors. Autumn is the best season for putting this into practice, due to its abundance of strong, manly, earthy colors.

Into the winter, (and yes, it will be just around the corner,) the colors of your autumn attire should gradually wash into the monochromatic. This isn't to say winter wear need be bleak; the peculiar bright crispness of winter light can be woven into your attire as well.

The hues of spring are in many ways the brighter, more saturated versions of those of autumn. Unlike the gradual transition of autumn-into-winter hues, traditionally, Easter is the time for exploding the color back into your attire all at once, to kick off your spring wardrobe. And summer, as you well know, is the time for getting a little crazy.

Don't be caught up in matching socks to slacks, or ties to shirts, or hats to coats. Be more concerned with matching your adult clothes "outward" to the tones of your environment, and you need never fear being mis-dressed.

Click here to go to the next essay chronologically.

Click here to go to the previous essay chronologically.

Click here to go back to the beginning.

Friday, July 20, 2012

Sock It To Me

Chapter 76
This week, we're going to dial it back a little, and go back to the basics of an Average Guy sartorial education. It's summer, it's hot, you're on vacation, and the last thing you want to do on vacation is overly tax your brains. So we'll keep it simple -- a topic so simple, it's often overlooked among the suits and hats and shoes, which get all the attention.

Let's consider socks. That's right: socks, the part of your attire that is quite literally the furthest from your mind. Socks are important, but too often overlooked in the heady rush to find the perfect jacket, the most awesome tie, or the ideal hat. The sock serves a mundane, utilitarian function: in winter, thick wooly ones keep your ankles warm; in summer, light cottony ones keep your shoes from getting sweaty and smelly. The sock is a small part of your attire from the point of view of fashion, but it is an important one nonetheless.

If you think of your socks as something that is never seen, then you are wearing your trousers too long. If your trousers are the proper length in the leg, whether straight or cuffed, the front should just break over the instep of your shoe, and cut back at a slight angle toward the rear, long enough to cover your socks completely, and the top ¼ to ½ inch of your shoes. When standing, no sock should be seen -- but when walking briskly, a flash of sock should be visible. When sitting normally in a chair, a couple inches of sock should be shown -- and when sitting cross-legged, several inches of sock is very visible.

What should your socks look like? Patience: we'll get there...

Let's deal with the issue of length first. When wearing trousers, your socks should be long enough that you never show a hint of leg, at any time. Test this by kneeling down, or by pulling your knee up to your chest. If there's as much as a glimpse of your hairy old calves, your socks are too short, and you need to purchase a longer size: calf-length or over-the-calf. When you wear shorts (e.g., on vacation) you need socks that are ankle-length. Calf-length socks with shorts are verboten. Don't cheat by scrunching long socks down, or rolling them: one looks sloppy, the other effeminate. True ankle-length only, that covers the ankle bones: for low-rise socks are an abomination. No socks are worn while swimming, approaching the sea to swim, or walking from the sea after having swum. Period.

If you like hand-knitted socks, garters are still made. 


Next, we move on to construction. Most socks are made with elastic sewn into the top these days, rendering sock garters unnecessary and wrinkled, droopy socks a thing of the past. If you have muscled calves that push your socks down, wear an over-the-calf model. There's no reason for droopy socks in today's world. Stay away from tube-style socks: your feet aren't shaped like tubes, nor should your socks be. Good socks will have reinforced toe caps, be made with a heel, and fit within a narrow range of shoe sizes -- not a one-size-fits-all.

Now, let's discuss materials. Stout wool is good insulation from the cold, cotton for heat and sportswear (although thin merino wool wicks perspiration better than cotton ever could,) any number of manufactured rayon/dacron/etc. blends are available, as well as more exotic materials like cashmere. There is but one place for thin black silk, and that is formalwear. A modern trend that bears consideration, and my personal preference, are socks made of bamboo viscose fiber; they have antimicrobial properties, as well as being remarkably soft and comfortable, they wick well, and are reasonably hard-wearing. Ultimately, you should be less concerned with exactly of what your socks are made, and more concerned with how much they cost, how long they last, how well they work, and how good they look.

That leads us to value. While it may seem to be a good deal to reach for the cheapest bag-o-socks at the big box store at five dollars a dozen, you will get a better bang for your buck by purchasing single pairs of higher quality. Pick and choose your selected colors and patterns, rotate through your socks, and discard them out of rotation at the first sign of thinning at the heel, and you will get more wears per dollar than "discount" socks can give you. This doesn't mean more expensive means longer lasting; by that logic, some Italian socks would last forever!


The price-value curve is a sharply-flattening asymptotic one in sockdom: a very small investment over the bargain-basement offerings can yield a sock of much higher quality, but you won't see much more improvement than that, even at a much higher price.

Now, the best quality and value sock on the planet will be of no use if it looks like moldy burlap, so now we'll turn our attention to appearances.

First, white socks of any description should not be worn with trousers -- ever. Wear them for sportswear, or at the gym. They have no other place in an adult's wardrobe.

As to color, pay no attention to the fashion bloggers who argue amongst themselves as to whether socks should match the trousers, match the shoes, match the tie, et cetera. Be more concerned with tone matching. Don't wear bright-colored socks for business use. Your work suiting will be in charcoals and greys and perhaps browns, maybe with pinstripes or overchecks, on largely smooth and plain fabrics -- in old-fashioned terms, "town wear." Match your socks to the sombre tone, with charcoals and greys and blacks. Don't go more extravagant than pindots or birdseyes, and keep the socks in a smooth or lightly ribbed texture. At work, your socks should be thoroughly in the background, and your tie should do the work of personalization alone.

After work, or with "country wear," is where you can let your personality show a bit more. Think of the relationship of sock to trousers as parallel to that of pocket square and jacket; a bit of color that enhances the overall impact of an outfit without overwhelming it. In the cooler months, where your suiting tends toward heavier or more textured wools and corduroys, your socks should become proportionately thicker and more heavily ribbed or textured as well. Your palette can run to the colors of fall, the rusts, russets, greens, greys, and burgundys; but muted and darkened in hue, and always tone-matched to your outfit. Patterns of herringbone, checks, stripes, houndstooth, tartan, and the ubiquitous Argyle can add some variety and interest to your lower extremities in the winter months.

As winter gives way to spring, and the world brightens around you, the muted tones can give way to brighter hues. As the dark suits of January gradually melt into the sport coats and tan trousers of April, your socks should brighten as well. Lighter tans and browns with stripes, checks, or figures work well with khakis and loafers, and your Argyle and houndstooth selections can become more vibrant as the weather clears and the trees awaken.

The heat of summer, with its commensurate explosion of color and style and general air of vacationality, is the time to go more experimental, like socks that exactly match your shirt or pocket square. Pastel socks in complementary colors: canary yellow against light blue trousers? Why not! Horizontal stripes, or bright multi checks? Sure! Anything goes; summer is the time to go a little crazy, as long as the outfit is in proper balance. For instance, a Bermuda suit with an aloha shirt needs a light solid-color ankle sock to ground it somewhat. Remember that all resort shorts need ankle socks, and unless you are playing shuffleboard or tennis, they should not be white, should tone-match the outfit, and most likely be plain.

The perfectly-engineered sock hanger.
Just a final few words about care: don't store your socks by pairing them together and turning them inside out in a bundle. Everyone does it, I know...but stop. It wears the elastic out prematurely, pulls them out of shape, and hides any wear (and the patterns and colors!) from view. If your socks come on wee little hangers, save them. Smooth your socks flat out of the dryer, re-hang them, and either lay them in a drawer or hang them up. You can choose a pair much easier, and inspect the heel wear at the same time. It may seem a bit fussy at first, but trust me: you'll thank me after the first two weeks.

Oh, one last thing: you will notice, in your sock shopping, that men's socks in the mid-price range are disturbingly mundane. Most are plain and dark; fine for work. Some are tan and grey and figured, and there are a few subtle checks and several Argyles. Once you find those, you will find yourself against a wall fairly rapidly. You will look in vain for the bright colors and vibrant patterns you know exist, but apparently not in your price range. Here's a secret: peek in the women's-wear section of the store. Socks are unisex, despite their packaging: if it fits, it fits. Sometimes the careful application of The Other Side's socks can give just the right effect to a bright summer ensemble. (Shh...I won't tell if you won't.)

Click here to go to the next essay chronologically.

Click here to go back to the previous essay chronologically.

Click here to go back to the beginning.

Friday, July 13, 2012

Liner Notes

Chapter 75
As the weeks of summer wend ever onward, the average guy who aspires to dress like a functioning member of society may come to an impasse; for there are some days that wearing a jacket --any jacket-- seems like an impossible task. A jacket, as I hope I have impressed upon you by this time, is an indispensable part of dressing not just well, but merely adequately.

In previous installments, I have alluded to the Bermuda suit and the unlined jacket for dealing with the heat on vacation, the classic Aloha shirt for casual days at home, as well as the jacket-and-scarf combo for tropical seaside resort wear. But what about those interminable weeks where you are simply going about your business at home and about town? How do you deal with the rising mercury then? Do you give up on proper clothing, put suits on hiatus, and break out the suntan oil and flip flops for the trip to the market or the walk to class?

I hope not, for there is a solution. Not all summer jackets have to be those cotton or seersucker candy-colored featherweight jobs. That's fine for the beach, but it may raise some eyebrows at the office. It's entirely possible to wear a perfectly normal-looking jacket that is no thicker or heavier than a shirt. It's all about what happens under the surface.

A great deal of the comfort of a jacket has to do with the lining. A silk or satin lined jacket serves two purposes: it slips smoothly over your shirt and waistcoat without snagging, and it serves as insulation. Most jackets are fully lined: that is, every bit of the interior surface is covered. Very nice in the winter...but it can be a bit stuffy in July.

The jacket I introduced you to last week is half-lined: silk on the front, sleeves, and shoulders, but the back is a single layer of shell fabric. Sometimes the raw edges of the back seam are covered with a thin roll of silk to prevent fraying. Quite nice when, for instance, you have to sit in a chair for extended periods. Having just that one breathable layer on your back makes a world of difference.

Taking that a step further is the quarter-lined jacket. In this case, the front and back are bare of silk, and the only lining is in the sleeves, and small triangular panels over the shoulders. In fact, when most people refer to an "unlined" coat, they actually mean quarter-lined. They are usually quite loose and unstructured: since there is no front lining, there is also no chest padding nor canvassing.

We can go even further, to skeleton-lined jackets. These have no lining at all except for the sleeves, and all the raw edges are covered with rolled silk strips. Since these don't have shoulder padding or chest padding, they have to be rather carefully fitted so as to not look overly sloppy. Some of the summery resort jackets you find are constructed this way.

Ultimately, jackets can be completely unlined: nothing in the sleeves, nothing on the edges, and but one layer of fabric all 'round. All the raw edges are rolled and basted in place. These jackets have to be fitted nearly like shirts.

One might think that the less lining a jacket has, the less expensive it would be; after all, there's less stuff to sew in, so it would be less work, right? Not at all! Lining covers a multitude of sins, raw edges, and sloppy needling. The more you can see of the interior, the more finished it has to be. Seam turn-unders have to be perfectly even, all the edges have to be carefully dealt with, and the pocket bags are hanging out on the inside and not hidden by silk, so they have to be very carefully made and finished as well. The overall cut is more sensitive to errors: instead of hanging off of the constructed shapes of the pad and canvas on your shoulders, the jacket simply hangs off of YOU.

The solution is simple. Either shell out three times as much for an off-the-peg summer jacket, or hire a tailor to make one for you. But what is the Average Guy to do? We can't afford to throw down good cash for  luxuries like unlined summer jackets...right?

I think you know where I'm going with this. That's right: we're going to make our own! This is a fun, quick-and-easy project at its most basic, or you can go into as much finishing work as you want to...it's one of those things that you can do no matter how much needling experience you have. If you've been following along with The Island of Misfit Clothes, it'll be a piece of cake!

A few caveats, first. This, like all the tailoring projects we handle here, is a compromise of factors. We'll start from a fully-lined jacket, and strip it down as far as we can, hot-rod style. The ugly interior will be exposed, and we'll clean up as best we can, but the result will be decidedly "function over form." Without a lining, the jacket will not drop into place as you are used to; it will be have to be more carefully placed and smoothed to remove snags and wrinkles. The upshot is you will be rewarded with a "stealth" jacket that looks and works like any other, but is as light as a shirt...and it will cost you nothing but your time.

This is the jacket I'll use. It's a salt-and-pepper tweed that is a light and loose weave. I've had it a couple of years now; it's an old alteration that started out as a size 44. It fits well enough, but I have other tweeds I like more for the cooler weather, and other linens I like more for warmer weather. So it's sort of an orphan, always passed over. Gutting it and using it as a "summer unliner" will give it a lot more use!

The point is, don't do this with a new jacket. Start from a secondhand model at best, and preferably use a donor jacket that you're saving from the dustbin. Unlined jackets wear quickly, so this should be reserved for those jackets you're giving a last lease on life.


First, get a good sharp X-acto knife (or a seam ripper) and settle into a comfortable chair. Start by freeing the lining from the rear vent, then the bottom edge, all the way around.

When the bottom hem is loose, start working your way up the front edges. You will see many new and interesting things, as shown here. Cut as far up as you can. In most cases the chest pocket overlaps the lining and into the lapel fabric. No fear; just cut up to that point on both sides for now.

Then turn your attention to the sleeves. Remove the cuff buttons, and cut the lining loose all around the cuff. There may be a stitch or two that holds the sleeve lining up inside the sleeve around the elbow: carefully nip them if needed. Since the sleeve lining is still held in place at the armscye, turn your attention back to the inside of the jacket.

Start from the back of the collar, and carefully release the lining, working around the lapels and down to the top side of the chest pocket. Now you can get to the armscyes and release the sleeve lining, and pull them out. You can see the shoulder padding and chest canvas now, as well as all the raw edges along the seams. The top of the chest pocket bag is tacked in place; nip those off, and the entire lining should now be held in place by the ends of the two chest pockets. If there are any other tack stitches in odd places, now is the place to nip those as well.

About an inch from the mouth of the pocket, cut the lining free. Don't cut the pocket bag! Just the lining, and don't cut it too close, either.

Now is the time to take some attention to prettying up those pocket bags.There's nothing we can do about the fabric or the color, but at least we can hide the raw edges and make things square. Fortunately, it's not hard; just roll the edges under and sew them in place with a hidden running pick-stitch, and press the edges flat. Pay particular attention to the mouth of the chest pocket, and don't inadvertently sew the pocket shut! (Yes, I've done it myself. More than once.)

This is what the pocket bag looks like when it's neatened up.

With the pockets taken care of, unfold the lapel and turn your attention to the canvas. This jacket was pretty lightly canvassed in the first place: the fronts and lapels were interfaced along their length, and the chest pad is a pretty small package of felt and horsehair. If this was a hand-padded and canvassed jacket, it would be a shame to rip it out...fortunately, this is all machine-made stuff, and easy to nip free of the fronts with a few sweeps of the knife. Pay attention to how the canvas is sewn to the armscye. It might be smarter (and less trouble) to cut the canvas out along the seam if it is sewn to the armscye and sleeve together. Same with the shoulder pads.

With the jacket now well and truly unlined, you're nearly done. Tack the end of the pocket bag in place, to keep the pocket from sagging. Don't forget to replace the cuff buttons, and your jacket can be worn as-is, right now, and you can finish it off to whatever degree you want at your leisure. Primarily, you need to decide what to do with the raw edges. Your choices are 1) do nothing, 2) bind the edges and hold them in place with a blind zigzag stitch, 3) roll and tack the edges and hold them down as you did with the pocket bags, with a running blind pick stitch, or 4) use silk bias tape to bind the edges with a true skeleton lining.


Since I had altered this jacket to fit previously, this didn't generate enough slop in the fit to make further alterations necessary. As you can see, with the internal structure gone, it assumes a much more casual and drapey cut. You may be tempted to take in the shoulders and side seams at this point to get a nice tight shoulder line and silhouette -- but remember the whole point of the exercise is to make as light and breezy a jacket as possible for the Unbearable Days! With linen trousers and a light summer shirt, this is as comfortable a jacket to wear now as anyone could ask for.

Click here to go to the next essay chronologically.

Click here to go back to the previous essay chronologically.

Click here to go back to the beginning.

Friday, July 6, 2012

Let's Get Shanked

(Part 15 of the series "The Island of Misfit Clothes.")
Chapter 74
You didn't think I'd forgotten about our jacket project, did you? It's been a few weeks since we've worked on it, but we're nearly completed now that the lining's been sewn back in. Fits like a glove, doesn't it? All those weeks spent ripping seams, repositioning, and sewing, re-sewing, and sewing again have really paid off...this worthless tent of a suit hangs on you now like a thousand-dollar bespoke item.

Well, nearly so. The shortcuts we've used to systematically and gradually minimize the faults in fit, would make a bespoke tailor blanch in horror -- but the end result is very, very good indeed, especially for a novice needleman like yourself. Well done.

This week we'll look at how to place the buttons, but with a twist -- I'm not going to use the jacket you've been staring at lo these many months to demonstrate. For a change of pace, we'll use a new jacket I just acquired, and I'll tell the story behind it.

We are in the heat of the summer season. It's now time to shift your wardrobe into summer mode, and that means taking your polo, golf, and aloha shirts out of storage and placing them back in rotation. If you followed along last Autumn, when I demonstrated how to store your summer shirts away, you should now have a stack of crisp, folded, tissue-wrapped shirts that await your attention, as the returning of old friends after a long absence: the clean scent and starched folds of your summerwear emerge from their paper-wrapped hibernation, new, unwrinkled, and fresh, and yet also familiar.

In keeping with my own advice given in last week's installment, I decided it was time to "roll over" my summer jackets as well. Yes, it is time for some jackets to go, in favor of others. Out with my light wool Yves Saint-Laurent. Serviceable and about a quarter-century old, but very conservative and very French. I've worn it for years, but it has gotten increasingly less use over time, as my personal style has shifted away from the "mid-century grey" cut.

Its replacement found me by surprise. Shopping with my wife for something else entirely, and strolling through the suit section of a local second-hand shop, I took a double-take at one that caught my eye. I was unprepared, and as I did not have my measurements or tape with me, dismissed it and walked on. My wife, who knows "that look" well, intervened. Forget the measurements, she said, and just try it on. Oh, very well.


I fell in love immediately. Well cut, good proportions, and right in line with all the tenets of Classic Style. It fit nearly perfectly -- no alterations would be necessary; this one is wearable as-is.


Another bonus for this ready-made summer suit: it is made of very light stuff, and is half-lined: that is, the lining only extends across the chest and over the shoulders.

Other than a small strip at the rear vent, the back isn't lined at all. You may not think this would make a large amount of difference, but it does -- it will be easy-wearing on all but the hottest days. The label shows it to be an Anderson-Little, which was doubtless made when the name was owned by Woolworth's, probably in the late 1970s.

This jacket has some very attractive features, like "pagoda shoulders" that terminate in a heavily rolled sleevehead. Notice the outer edge of the lapels point directly to the top of the shoulder. The resulting generous lapels stand well within the limits of Classic Style, in stark contrast to the current fad of wee little skimpy lapels.

Advanced Geometry nightmares?
"Pagoda shoulders" refer to the line from neck to arm: it is a slight concave curve, like the roof of a Japanese pagoda. The resulting saddle-shaped form is called a hyperbolic paraboloid, and takes a fair amount of effort to execute well.


Another nice touch is the strongly shaped collar line. The elegant curves allow it to sit perfectly flat against the curve of the shoulder.


The chest canvassing is very firm and shaped, perfectly smooth, and sits into the waist nicely. It is a very English cut, despite being a thoroughly American jacket.

 The length is shown to be in line with Classic Style as well: long enough to curl one's fingers over the hem with a straight arm. The sleeve is just long enough to touch the base of the wrist. That's slightly long if worn with long sleeves...but just perfect when paired with a short-sleeved shirt, which is in fact my plan.

As perfect as all this seems, it isn't completely perfect, or else I wouldn't be talking about it, now would I? As you know, I need to adjust its button stance to account for my slightly low shoulder. As I've shown this before in a previous installment, you may ask, why go through the process again? Two reasons. One: the first time, I demonstrated the process on a tailor's form. This time, I'll show how to do it directly on yourself. And second, the first example used covered buttons, and our jacket project (and this jacket as well) uses regular four-hole buttons.

Whether your shoulders are symmetrical or not, this will guarantee your jacket will fit as perfectly as possible around your neck, whether you are just moving the buttons slightly, as here, or starting from scratch, as we are with our project jacket.

First, put the jacket on, over a collared shirt. (Make sure the collar fits, of course, and buttoned up. We're getting a baseline dimension, after all.) Reach up, grab the collar from both ends, center it on the back of your neck, and pull it forward firmly. Don't think about your shoulders -- hold them naturally.


Keeping the tension on the collar, slide your hands down the lapels, and bring the fronts together. (Notice that the buttons don't line up with the buttonholes? Typical.) Make sure you are still holding your shoulders naturally.

Slide a straight pin into the button-side by going in right through the eye of the buttonhole. Push the pin all the way through, so the head of the pin marks exactly where the button needs to be. Do this for all the buttonholes.

Relax your arms and your shoulders, shrug a couple of times, and let your arms hang naturally. (Note that the fronts aren't falling away -- a sign of proper jacket balance.) The pins and buttonholes should be exactly opposite each other. It's then a simple matter to sew the buttons in the right place.
Did I say "simple matter?" Why yes, but it's not as easy as sewing a shirt button: you can't just go in one hole and out the other a couple of times and be done with it. You don't want the stitches to show on the fabric behind the button, for one thing; and the other is that little mushroom-stalk of thread under the button, called a shank. The button needs to sit a little "proud" to poke through the buttonhole. How do you do it? Well, first, cut the existing button off, and remove the threads.

Load your needle with buttonhole or upholstery thread. Start your needle on the back side about an inch away from the straight pin, run sideways inside the fabric...


...and come out on the topside exactly where the head of the pin is. Remove the pin, pull the line almost all the way through...

...and secure it by tying it off to a single thread on the front side. Clip the thread on the back side, pull the fabric a little, and the end of the line will disappear into the inside of the jacket. That's a neat enough trick in itself, but there's more!


The secret to sewing a shank button is... [insert drum roll] ...a wooden match. No fancy gizmos or appliances required.
Slide the button down the line, with the match behind it. The idea we're pursuing is to sew the button down around the match. The first two stitches will straddle the match and hold everything in place. This is done as you would expect: straight down through the fabric, and straight up again through an adjacent hole in your button. The difference is, only catch a single thread on the back side of the fabric, and those two wee stitches will be practically invisible.
This is what it looks like from the side. Unlike shirt buttons, don't run the line in a criss-cross through the holes, but work the box: up through top right, down through bottom right, up through bottom left, down through top left.


Work the box three or four times around, but unlike the first two stitches, when you go down through the button...

...tilt the button up and don't go through the fabric. Pull the line through, then take a small sideways bite through the fabric. Go deep enough to grab the canvas, then up through the button again.


The button will be firmly sewn down around the matchstick, but without any stitches showing on the backside.


Slide the matchstick out...


...and wrap the thread tightly around the base of the button about a dozen times, until you've made a stout little trunk.


Stab the needle right through the trunk, twice, to secure the line.


Run the needle sideways from the base of the button, come out on the backside about an inch away...


...and clip the end of the line.


Hide it inside as before, and your button will have no loose ends showing; a very professional finish.


The result is a collar that sits tight to the neck and smooth down the front...

...and when worn open, the buttons are perfectly even.

This little number is ready to take its place in my spring-and-summer wardrobe, where it'll last for years. Oh, did I mention the cost? Forget bespoke, forget off-the-rack, forget big box warehouses. This jacket has hardly been worn, if in fact its been worn at all. It shows no wear, and the original yellow chalk marks under the buttons were still there. Six dollars. Six. You can do it too. And you should.

EPILOGUE:

Setting the buttons also brings us to the end of our jacket project, and with it, we bid a fond farewell to the Island of Misfit Clothes series. Before we go, let's take a look at the actual project suit, after the same button stance alteration that we just went through today.


Here we are! It went well, all things considered: you never would be able to tell that this jacket was a shapeless barrel shaped bag when we started out. This should be proof positive that not only can you make such an outsized suit fit you, it can fit your idiosyncratic posture as well; and you can do it yourself with a minimum of fuss, with basic tools and a just little bit of initiative.

The details that remain can be performed with relative ease using the knowledge you've acquired so far. The sleeves are a tad short and must be let out. After your work with sleeve linings, hem lengths, pressing, and such, it will be a piece of cake for you! (Hint: release the lining at the wrist, remove the buttons, fold down the turn-under to length, press, and re-assemble.) Likewise with the excess girth in the waistcoat -- the side seams can be taken in the exact same way as we did with the jacket. The trousers we've already covered, in the first weeks of The Island. As it turns out, I won't have to take these trousers in, as I seem to have gained about four inches in my waist over the past year: all that was needed was to let the cuff out to gain an extra inch in the leg. And that's a good lesson: when you take an article of clothing in, leave the extra turn-in in place, just in case you gain weight and have to let it back out!

Click here to go to the next essay chronologically.

Click here to go back to Part Fourteen of The Island of Misfit Clothes.

Click here to go back to the previous essay chronologically.

Click here to go back to Part One of The Island of Misfit Clothes.

Click here to go back to the beginning.