Showing posts with label Theory. Show all posts

Friday, August 1, 2014

Mandatory Finishing-School

Appendix 3.

In our previous installment, all the way back in Chapter 10, we discussed the importance of deportment and etiquette to be a well-rounded, as well as a well-dressed, person. Actually, the phrase I used was, "We seem to be desperately, hopelessly in need of mandatory finishing-schools." I left you at the end of that essay with the exhortation, "You can do something about you. Start with you."

Well, for those of you who have been left hanging by that rather broad, vague dictum, I have a couple of books to share with you. Think of it as a virtual finishing-school, that will help put the polish on your actions. Both books are included here for your use: old and musty, but still full of the classic goodness that modern men need to know.

There's also, amongst the useful bits, a fair amount of antiquated curiositae, and detailed regulations for activities and events that simply don't exist anymore; so I'll summarize each book first by their chapter headings. You can then skip to the relevant sections, or read the less-relevant passages for the historical interest.

(These books are currently hosted and imbedded with GoogleDrive; if bandwidth limits prevent them appearing below, click the "download" link in the window, which will switch the window from a GoogleDrive viewer to a PDF viewer. If this continues to be a problem, I'll try to find a more suitable hosting service.)

First, we have the  
Gentlemen's Book of Etiquette 
and Manual of Politeness, 
written by Cecil B. Hartley. The publishers specialized in books for young men, with a focus on history and self-improvement. Because it's geared toward young men just entering society, it's exceptionally easy-reading for a book published in 1873. Tellingly, Hartley notes that etiquette may seem unnatural, but stiffness is not the same as politeness. This is utterly at variance to what most people today think of mid-19th century manners!

Chapter 1, covering "Conversation," (p.11) is useful no matter what the era, and just as applicable to the social-media driven world of today, as well as the oft-neglected art of face-to-face communication.

Chapter 2, "Politeness," (p.31) is defined as how we treat those that we find personally disagreeable, and is distinguished from etiquette; one being internal thought, the other the external manifestation of rules. There are several good thoughts in this chapter that would be good to internalize, (although it tends to run a bit long into the Quality of a Gentleman that today rings a tad rustic.)

Chapter 3, about "Table Etiquette," (p.50) at first blush seems hopelessly dated in the details, but it contains so much common-sense wisdom, and is written so well, it is worth a read to take the spirit of the chapter to heart.

Chapter 4, "Etiquette In the Street," (p.66) is largely antiquated today in its detail, beyond the observations of general courtesy; and chapter 5, "Etiquette for Calling," (p.75) is a mere historical oddity -- the shorthand of calling cards were the Victorian equivalent of instant messaging.

Chapter 6, "Etiquette for the Ballroom," (p.91) although the specifics are far past their sell-date, contains many useful tips for proper deportment when entertaining in general. (If one is into ballroom dancing, some of the details are historically enlightening.)

Chapter 7, on "Dress," (p.115) is the one that should be mandatory reading for all men. A more concise summary of the attitude of proper dress, and its attendant hygiene, has rarely been written. Even taking into account the peculiarities of whiskers, hairstyles, and subtle classism, the wisdom underlying the words remains.

Chapter 8 concerns itself with "Manly Exercises." (p.154) Today we're if anything over-educated on rigorous exercise programs, but this look at some more practical and enjoyable 19th century pursuits, like riding and driving, boxing, sailing, hunting, skating, swimming, and yes, even cricket, is worth a read.

Chapter 9, "Traveling," (p.176) is deceptively useful, whether you actually travel regularly or not.

Chapter 10, "Etiquette in Church," (p.183) is a good general guide when you are in any unfamiliar situation, church or not.

Chapter 11 is "One Hundred Hints for Gentlemanly Deportment." (p.186) This is another mandatory chapter, and indeed could be a separate book in its own right. Some 'hints' are summaries of points previously mentioned in detail, and some are 'catch-all' generalities that don't fit into neat categories. Each point is short, to the point, and most of them are general enough to be just as true today as much as they were in 1870.

Chapter 12, "Parties," (p.222) has become passè in its detail for the most part, as the sort of soirèe described is not seen today outside the realm of historical re-creationists. Similarly, chapter 13, "Courtesy at Home," (p.228) presents antiquated specifics of keeping house, and is only relevant today in its broadest strokes, which are amply covered by other chapters.

Chapter 14, "True Courtesy," (p.244) is an elegant presentation of politeness without affectation, native dignity without vulgarity -- this chapter is essential reading.

Chapter 15, "Letter Writing," (p.252) is almost shockingly relevant, in this world of e-mails, tweets, and IMs.

Chapter 16, "Wedding Etiquette," (p.280) is somewhat out of the sphere of common use, but weddings are so poorly done today, following this chapter would be a vast improvement. Chapter 17, "Etiquette for Places of Amusement," (p.294) is along the same vein. Going to the theatre or opera are not now commonplace...but if you were to go, this is how to go about it and not look like Larry the Cable Guy.

And finally, chapter 18 is a "Miscellaneous" (p.298) melting-pot of ideas, some relevant, some less so, and a couple bordering on ridiculousness.


The second example we'll look at is
Martine's Hand-Book of Etiquette 
and Guide to True Politeness, 
written by Arthur Martine in 1866.  In counterpoint to the well-ordered chapters of Hartley, Martine's sections, written only a decade earlier, read like collections of 'bullet points,' which hit wide targets like scattershot through a musket.

Martine's is pointed to both men and women, and is more noticeably dated because of it. The suggestions given to men are the more timeless, fortunately, and should not be shunned because of the old-fashioned advice he gives to the gals.

"The Art of Conversation" (p.8) and "General Rules for Conversation" (p.24) are excellent companion pieces to Chapter 1 of Hartley's book.

"On Dress" (p.48) treats mostly of women, but the words to men echo Chapter 7 of Hartley nicely.

"Introductions" (p.57) and "Letters of Introduction" (p.61) have largely passed into history, and there is little here to recommend it to the modern reader.

Martine has much to say about eating. "Dinner Parties" (p.63) are seldom given today, and when they are, are usually not given well. If you are inclined to attempt them, it's a useful section.

However, "Habits At Table" (p.67) "Wine At Table" (p.74) and "Carving" (p.82) are equal parts surprising common-sense and high manners to modern sensibilities, and are an essential read, superior to Hartley's Chapter 3.

"Etiquette of the Ball and Assembly Room" (p.93) and "Evening Parties" (p.104) are best read as adjuncts to Hartley's Chapters 6 and 12: useful for re-enactments, but little else today. "Visiting" (p.113) is interesting only as a historical curiosity--but it's very interesting, as is "Street Etiquette" (p.127)

"Traveling" (p.133) has some good pointers for those who still use public or mass transit.

"Marriage" (p.136) and "Domestic Etiquette and Duties" (p.144) are addressed primarily to the chicks, and of all the sections in Martine's, suffers the most from outdated standards -- but there are still good-intentioned ideas for men to glean as regards La Bonheur Domestique that is applicable to modern life.

"On General Society" (p.154) is a mixed bag, out of which may be plucked the occasional plum.


Friday, July 4, 2014

The Calculus of Dressing

Appendix 2.

Back in the installment Chapter 70, called “Keeping Your Balance,” we looked at the concept of weighing specific style variations, each against each other, to achieve a harmonious whole within a single outfit. To help visualize this, I devised a graphic representation of the continuum of balance as a three-dimensional cube, each of the axes standing for one range of opposites—the Continuum Cube.

That was all well and good for an overview, but it was the stripped down, basic version – there’s actually more to the theory than what I posted there! I gave a more complete view in my published works, but here in the Appendices I am going to share with you the fully-realized, advanced theory.

The complete theory of balance is visualized scientifically here by use of a four-dimensional theoretical construct of the Continuum Cube—a Grand Unified Theory of dressing well, if you will, that graphs every possible option of menswear for every possible circumstance.

There have been numerous philosophical postulations over the years concerning the art of dressing well. To those we can now add a mathematical theorem, a graphic distillation of the musings of D’Aurevilly, Wilde, Bulwer-Lytton and de Balzac, which clarifies and concretizes their ideas in a clear way: that dressing well is an ethos, an attitude and outlook on the world that just happens to be reflected in its external appearance. The most obvious aspect of your appearance is your refinement of the art of dressing well: to be correctly and impeccably attired in any given situation. As Brummel said, “If John Bull turns to look after you, you are not well-dressed, but either too stiff, too tight, or too fashionable.”

Let’s start with the idea of formality. You have an innate sense of the degree of formality of any outfit you might be called upon to wear. You wear nicer clothes to church than you do to work, and nicer clothes to a wedding than you do to church; and if you were playing golf, you would be dressed better than if you were playing tennis. If you were to graph all the different sorts of clothes you wear, you could represent them as a line, with the dressiest at one end, and the most casual at the other. We'll call the two extremes “formal” and “sporty.” What we would have is a bit of geometry: a line. It would look like this:


Notice that from any point on the line, you could choose something more formal, or sportier (you could also call it “casual” or “informal.”) Our line extends forever in both directions, as lines do, but that won't do for us; for you can't go on increasing formality forever.


The solution is to make the line asymptotic and the end-points as a limit, which can be approached infinitely closely, but you actually can’t truly “get there.” Reaching the limit is relativistic—the closer you get, the further you have to go, and the harder it is to get there. One limit is the point beyond which you can't get any more formal. That point represents the dress suit: for white tie and tails is the most formal thing a man can wear in the Western world. In other cultures it may take a different form, but the result is the same.


Logically, at the other end is an asymptotic limit beyond which one can't get more casual – which, it stands to reason, is being entirely naked. (Why is this, you may ask? Patience…we'll discover why soon.)


So our line segment, our X axis, if you will, looks like this:


Every element and article you wear fits somewhere along this line. The goal is an average between two extremes that is not too far out of the range of “normal” for your particular place and circumstance; whether this is attending a wedding or shopping for groceries. In other words, for any point on the line, any deviation on one side of the point must be weighed carefully against its variation on the opposite side of the point, to achieve a harmonious whole. The problem in today's world arises when a man doesn't know what to wear at all, much less how to find what an average value is, and even less how to work the extremes to maintain that balance properly.

As an example: everyone has at some point been subjected to such aberrations as a tuxedo jacket that has been paired with sneakers, or a patterned shirt, or a loosely-knotted long tie, or a silly hat, or sloppy jeans. Their misguided thinking is that a dinner jackets' formality will be offset by the other things, and the average will be dressy-casual.

This doesn't work in practice, because the attempt to balance two variations is increasingly unlikely to create a harmonious average the farther apart those extremes are. In fact, dinner dress is so extremely proscribed, it takes very little to push its balance to a place of informality: all that is needed are minor alterations to detail, like a subtly-colored boutonniere, a flash of pocket square, a rakishly-designed waistcoat, or even the material of the jacket itself.

It seems pretty easy so far, doesn't it? Well, we have another line, which describes another dimension of being properly dressed: the difference between “town” and “country” wear. Whilst the “Formal/Sporty” line describes the differences in the purpose and cut of your clothes, the “Town/Country” line is concerned with your clothes' color and pattern: for mens' clothes should properly match the environment in which they are worn. A “town suit,” for instance, is plainly cut and conservatively tailored, with smooth fabrics and dark colors, usually in shades of black or blue: the colors of steel and iron and concrete, the textures of glass and chrome and macadam.


A “country suit” tends toward the rough tweeds, pebbly or textured fabrics, in browns or greens, in plaids, checks, or other patterns, with details like collar tabs, elbow patches, or flapped pockets: the colors and textures of nature, with details that reflect outdoor pursuits.


This line, too, has two asymptotic limits, and those limits are of necessity the same as with the formality continuum: the most “Town” you can get is a dress suit of white tie and tails, and the most “Country” is not dressed at all. The two scales that we have seen operate independently of each other: for every point of formality, there can be applied the complete range of values in possible color and pattern. We can graph these against each other on an X and Y axis.


Most men have a passing experience in the art of color and pattern matching. At its most basic, it is an intuitive reflex. A dark suit needs a light shirt and a bright tie, for instance; or else the suit looks muddy and somber. A light suit looks better with a patterned shirt of a darker color, and so on. Making informed decisions regarding pattern takes more experience, but is also largely intuitive. Matching a plaid shirt with a plaid tie may look busy if they are in the same color range and size, especially if paired with a plain suit; but a suit with a subtle pattern paired with a very light plaid shirt and a very strong plaid tie may look very handsome indeed. It's all in the balance created between the factors.

If we were to graph every possible combination of these two groups of extremes, we would discover the result is the limit of a square, each point of which describes one individual shade of purpose and cut, color and pattern.


Dressing well now becomes a matter of determining your purpose and location at any given time, charting that point on the graph, and making your clothing suitable to that point on the X-Y axis. The closer the average effect of your clothing is to that point, the more “correctly” you will be seen to be dressed. On this square, the front right-hand corner, representing maximum values of Town-Formal, would represent the dress suit; and the rear left corner, representing maximum values of Country-Sporty, would be nudity. (This latter corner, naturally, is to be avoided if you desire to be a well-dressed fellow.) The relationship of all four factors taken together is the balance of your outfit.

Where the axes cross, (we'll call it point 0,0) is a theoretical neutral outfit that is all-purpose, neither too dressy nor too sporty, that would not look too out of place either in the city or out camping. This theoretical middle-of-the-road outfit would not be a panacea that would be instantly accepted anywhere, mind you! It would, rather, be bland porridge, neither one thing nor another, and you would likely be seen everywhere as not quite fitting in, no matter where you were or what you were doing. The neutral point at the center of the graph is not a target at which to aim – it is a sinkhole to be avoided!

Before we continue, let's look at some examples of how to use the scale as we have constructed it thus far.

You can adjust the balance to your immediate purpose, by changing a single detail to adjust the point along both axes. A matching three-piece looks official and professional for a business meeting, and would occupy a place well in the Town scale, and moderately in the Formal scale. Simply change out the matching waistcoat for a tattersall version, and the outfit looks less stuffy for an evening out, by skewing the point both towards the Sporty and Country.

You can also make an adjustment to either scale independently. Running to the auto-parts store to buy an oil filter and spark plugs in a suit and tie may raise some eyebrows, but you can keep the same point along the Formal continuum and slide the Town continuum strongly into the Country realm with a hardy tweed jacket, open-collar shirt and dungarees: the message is that grungy business is at hand. A seersucker suit, loafers, and a bow tie looks fine on the boardwalk, firmly in the Sporty-Country quadrant, but you wouldn't wear it to church without skewing it into the Country-Formal quadrant.

These basic style decisions can be complicated with variable factors such as the time of year and the immediate weather conditions. For instance, on a bright day, a pair of tan trousers may look fine with a mid-gray plain weave jacket; but on an overcast day, it would appear too Country, and a darker gray herringbone jacket to skew it slightly towards the Town side may look better. In the heat of summer, a shirt and tie may look overdressed in lieu of a simple polo shirt under your jacket; but in the fall, going without a tie may result in an underdressed appearance.

Now that you've gotten familiar with the two-axis system of clothing balance, we'll add a third measure to the continuum. Just like the other two, this third balance factor operates independently, and can be applied to every point in the square. This scale will be applied to your clothes' style and detail.


At one end, we have the historical extreme – the traditional, conservative, classic styles. At the other end, the contemporary extreme – the avant-garde, imaginative, futuristic, and innovative styles. We'll place this continuum at right angles to the other two, along the Z-axis: and call the extremes “Historical” and “Innovative.” Simply, the further along the “Innovative” direction you go, the further away you get from tried-and-true style trends.


When we graph every possibility of style against our other two measures, all the major factors of sartorial balance are accounted for and can be reduced to three continua. These continua can be visualized and plotted against each other as axes on a three-dimensional graph.


This is the Continuum Cube. Any point within this cube is defined by our three balance factors. The continuum is the limit of a cube; it is not unbounded on all sides. The ideal, as it was with the two-axis plane, is not the intersection of the axes at the exact center of the cube. Near the external faces of the cube are the limits of perspicacity, where clothes become costume. And just as you've seen with each individual scale, and also with the X-Y axis, the X-Y-Z axis has the same oppositional value, viz., the “Fully Dressed Point” at maximum Town-Formal-Historical is counterbalanced by its logical opposite at maximum Sporty-Country-Innovative – the “Fully Undressed Point.”

Let's use the Continuum Cube now to briefly demonstrate how skewing works along all three axes. We'll start at an easy point to visualize: the top right corner of the cube that pegs all three scales for formal, town, historical wear. Of course, it's the dress suit again: bespoke tailcoat and trousers, boiled-front shirt, pique Marcella waistcoat, stiff detachable wing collar, white tie, and patent leather pumps, with all the accompanying studs, links, straps, braces, and buttons that go with it. You can't get more Formal-Town-Historical than that. It's a very exacting and unforgiving point on the cube, right at the end of the limits, and must be followed precisely, because right on the apex of the cube is where it belongs.

Because of its precarious position, the dress suit is easily knocked off its apex by the addition or alteration of any detail. A simple boutonniere will skew the outfit slightly down the X axis, ever so slightly away from Formal. Substitute balmorals for pumps, and the skew jumps further down the Sporty scale, as well as the Country, and even slightly Innovative, and just like that – you're off the face of the cube and into the interior. This lone example also demonstrates why proper white tie is as exacting as it is.

Why is nudity the “Fully Undressed Point,” and not, say, swimming trunks, or even underwear? Because even swim trunks are subject to variations in sportiness, color, texture, and historicity, all of which will place it somewhere within the boundaries of the Cube, even if it is just adjacent to the apex. There just isn't a garment that is the opposite of a dress suit: as the limits of the axes are reached, the options of the furthermost point dwindle down, until the point of the apex is...nothing.

The apex and surface points are for our purposes theoretical: since a limit by definition can never be reached, you won't be dealing with the extremes on the faces of the cube. You will be dealing with any number of factors that will average into a value somewhere in the middle interior of the continuum.

Now, the three-dimensional Continuum Cube only works as far as the physical aspect of your clothes – but as we’ve found, how you wear your clothes, your degree of insouciance and panache, has an effect on where they skew on the Cube as well. This is of particular interest, as a properly insouciant attitude is integral to being perceived as well-dressed. So we must bring another axis in play – a W axis, at right angles to the other three, to make a hypercube.

What’s that you say? You’ve no idea how that works? Well, let’s work through the progression mentally. Take a point, and put another point at right angles to it. (Since a point has no dimension, technically “right angles” is any direction at all, but we’ll call it “right angles” for the sake of consistency of the illustration.) These two points form a one-dimensional figure: a line segment. It runs in one direction—length. Now take a line segment, and put four of them at right angles to each other such that they define an area. You have made a two-dimensional square: it runs in two directions—length and width. Now take six squares, and put them at right angles to each other so that they define an area. You have a cube now: three dimensions, three directions—length, width, and depth. Of course, here on your computer screen it’s merely a shadow of a three-dimensional form, but your brain recognizes it as a cube, even though all the sides aren’t the same length and the angles aren’t ninety degrees.


So far so good, but now it gets tricky. Continue the pattern: two points, four lines, six squares – now what? Of course, eight cubes; at right angles to each other such that they define an area of four dimensions. The problem comes when we try to imagine the W-axis, at right angles to the X, Y, and Z axes. What’s after height, width, and depth? The best we can see is a three-dimensional shadow, reduced again to two dimensions on your screen – a mere shadow of a shadow.


Because it is so devilishly hard to imagine a four-dimensional hypercube, and even more difficult to represent it on a two-dimensional computer screen, I won't even attempt to include it graphically. That fourth dimension represents the manner of the method and attitude of wearing your clothing and the degree of precision of its physical execution. At one limit, we have nonchalant, detached, easygoing, and breezy. At the other extreme, calculated, purposeful, precise, and severe. 


Graphed against the other 3 axes, the limit of Nonchalance coincides with the “Fully Dressed Limit” of Town-Formal-Historical, and the limit of Precision coincides with the “Fully Undressed Limit” of Sporty-Country-Innovative; thus, the closer to fully dressed one is, the more nonchalance is required. Contrariwise, the more casual your clothing, the more precision is required to offset the ever-present danger of slovenliness.

This presents a useful method of representing the fourth dimension of the Continuum Cube in relation to the other three directions. We know the limits of Nonchalance/Precision coincide with the limits of the other three continua, and we know each three-dimensional point is subject to the complete four-dimensional variance. (If this is befuddling, just reduce the exercise by one dimension: every single point on the two-dimensional graph of Formal/Sporty and Town/Country is subject to the entire scope of the Historical/Innovative variation.)

If the four extreme limits located at opposite apices of our hypercube (the F/T/H/N and the S/C/I/P limits) are then connected by a line, it will also pass through the midpoint of the W, X, Y, and Z axes, (at 0,0,0,0,) and a new axis is created: what I shall call the DANDY AXIS. (Dandy in its historical sense: as representing the apex of the art of dressing well from a holistic mind/body standpoint.)


Quite simply, for any circumstance, the most elegant mode of dress will exist at some particular point along the Dandy Axis, wherein all four continuua shift together in an equalinear progression. All four factors will then be in harmony, no one variation will stand out among the others, and for any given situation there exists a correlating given point on the Dandy Axis wherein you will assuredly be properly dressed, and John Bull will be given no reason to turn his head to look after you.

The relationship of the Dandy Axis to the four directional axes W, X, Y, and Z can be easily illustrated by separating the four dimensions out and placing them alongside each other, as scales on a slide rule. The Dandy Axis is represented by the movable cursor, which intersects all four axes perpendicularly along congruent points. This is a handy mental tool for determining correct dress: when only one factor is known, the other three are immediately apparent. In other words, for any given known Purpose (X-axis,) the proper relative degrees of Location (Y-axis,) Tradition (Z-axis,) and Execution (W-axis) are revealed in their correct place.


But now, back to the Continuum Cube itself. The Dandy Axis is the average of all the values at each point of the cube. This is an important relationship: for at whichever point in the interior of the cube you may find yourself, that point will always be perpendicular to a correlating point somewhere along the length of the Dandy Axis, as well as set a certain distance apart from it.

The Dandy Axis is thus very useful in revealing instantly, in a relative way, both “how dressed” you are, as a function of the point along the Dandy Axis' length, as well as any deviation from the proper standard, as a function of your point's distance from the Axis.

It can also be a useful compass, to give you an “absolute value” of just how dressed you are compared to any other point in the Continuum Cube. Let's take an example, and a rather obvious one, that demonstrates graphically how “more dressed” doesn't necessarily equate to “more clothes.” First, we'll take a tee-shirt, flip-flops, and cargo shorts, and plot its point within the Cube.


This graphic is looking straight down along the Dandy Axis, through the cube, to its S/C/I/P apex. The cube has been “sliced” through our point on a plane perpendicular to the Axis, resulting in the small tetrahedral figure. The size of the tetrahedron indicates that our point is close to the “undress limit” of the cube. Note, too, the distance of our point from the Dandy Axis.

Now, let us compare this to a different point, this one representative of a polo shirt, Bermuda shorts, and boat shoes.


This outfit covers the same amount of skin, and fulfills the same function, as the previous one. Its relative position in the Cube, skewed toward the Historical and Formal ranges slightly, cause it to sit perpendicularly to the Dandy Axis further along its length from the “undress apex,” (indicated by the larger size of the tetrahedron; due to the larger “bite” of the cube the cut has taken) and closer to the Dandy Axis itself: resulting in being “more correctly dressed,” with the same amount of clothing. (This assumes the optimal dandy values along the W axis for each point, as well.)

With practice, you can keep the Continuum Cube in your minds' eye as you decide what to wear, place a target point within the cube along the Dandy Axis, and choose clothes that will average into that target point. By looking at what you wear in this theoretical way, and fitting it into this matrix, you needn't be operating solely on intuition and guesswork, and you will have a solid guide for making wise sartorial decisions that will never inadvertently hit wide of the mark, by being too showy, anachronistic, or situationally inappropriate...or as Brummel would say, “too stiff, tight, or fashionable.”

Click here to go back to the installment that this Appendix references.

Friday, December 7, 2012

Strike While the Iron's Hot

(Part 4 of the series, "Iron Man.")
Chapter 96
We've come at last to the end of our journey, and of our Iron Restoration Project. Over the past few weeks we've found a nice vintage iron, taken it apart, discovered what makes it tick, cleaned up the business end, and fixed fifty-odd years of entropy and misuse. This week, we'll turn our attention to the Shiny Bits, and turn back the clock on the exterior as well.

Here are all the exterior components laid out to view: essentially everything save the soleplate, reservoir, and fasteners. All except the cord are subject to a good cleaning: (all we can do with that is subject the plug and boot to an automotive-grade rubber protectant.) Before we turn to the scrubbing, though, we must separate mere dirt and grime from actual physical damage that needs to be repaired.

A good example of reparable damage: a dent on the switchplate. You can see it between the Rayon and Wool settings. This is fairly common on these irons: a sign that at some point it has taken a header off the ironing board and landed on its top-front edge.

The back side of the switchplate reveals the underside of the dent clearly. Fixing it is simple: just dent it backwards. It's an old auto body repair trick: determine exactly how the dent occurred (in this case, a sharp knock along the leading edge, that rolled the deformation out into a semicircular crescent shape,) and apply reverse pressure starting from the outer edge of the roll, and work in.

A wooden chopstick and light hammer work perfectly. Place the end of the stick just where you need it, hold the piece flat against a table, and give it a light rap. Move the stick slightly, and rap again. You'll pick up a rhythm, a tap every half second or so, before long. Work the ever-decreasing crescent inward, ending at the initial knock-point, then turn the switchplate on its end and straighten out the edge. Take it easily and methodically, and the dent will gradually disappear.

Now we're ready to use some more elbow grease. Best to use a shallow tub; you don't want to lose any parts down the sink drain! Put a few inches of hot water and a goodly amount of liquid degreasing detergent, and "borrow" a bristle brush.

Take the pieces one by one and give them a thorough scrubbing until the ages of accumulated crud lift away.

Another handy tip: a wet, wadded-up piece of aluminum foil works wonders on stainless steel, (and chrome, too.)

After all is thoroughly clean and dry, lay all your parts out together. Now is the time of truth and glory -- when everything comes back together!

First, drop in the steam button, remembering to keep the same orientation by which it was removed.

Assemble the three parts of the switchplate and thermostat knob, and slide them home. Hold the steam button up from the underside with one finger at first; then the switchplate will hold the button in place.

Next, screw the handle onto the housing.

Take the reservoir, hold the steam dome in place, and start screwing the plug in by hand. Snug it with your wrench.

Put the spring ring on the fill neck, and slide the stopper rod in place.

Hold the reservoir up into the housing, and press the fill funnel into the hole in the fill neck. 

So far, so good -- but now comes the tricky part! The cam turner has to engage between the thermostat knob and the wedge cam, and it has to be done blind: you can't see what the turner's doing when you put the soleplate on. Here's the best way to improve your chances of success. Sight up through the hole in the reservoir until you can see the light shining through the slot in the thermostat lever. That gives you a target to aim for...


...when you drop the cam turner in. Notice that one end is offset and "points" to the knob. 


The next thing one would do is cut an asbestos mat the size of the reservoir, cut out all the necessary access holes, and lay it in place. Only one problem with that -- you can't get asbestos any more. It's a wonderful non-conductive insulating material that repels heat. Unfortunately, it also releases tiny airborne fibers that get stuck in your lungs and cause cancer. Thermal-insulating fiberglass mat may be the best alternative...but I don't have any on-hand. Before I go out and buy some, I'm going to assemble it sans insulation and test it that way, to see if it's really needed. 


But now back to the cam-turner. Turn the thermostat to the halfway position, so the turner is oriented fore-and-aft.


Then turn the wedge cam 90° so that its slot matches the turner.

Now, carefully lower the soleplate onto the housing. Notice that the cam turner comes in at an angle, so lower the back end of the soleplate first, line up the slot, and lower into place. Check to be sure the turner is engaged by moving the thermostat lever and putting your ear at the baseplate: if you hear the follower sliding along the cam, and the thermostat moves with a little resistance, you got it right. If not, try it again. Be patient; it may take a couple tries.

Turn the iron over, and press firmly on the front of the housing to seat the steam dome into the soleplate. Start the two attaching nuts by hand, and snug them up with your wrench. Then put the trim plate back in place.

Now attach the cord: line up the spade connectors, route the wires as they were originally, and gently snug the screws. Finally, with great ceremony, screw the hatch in place.

We're almost done! All that's left is the final testing. Get out your ironing board and something to iron, a fluffy towel, for instance. Safety first: plug into a GFCI outlet in case of a catastrophic failure...and turn your new iron on its lowest setting. If the GFCI breaker doesn't trip, (or, if you don't have one, if your house fuse doesn't blow!) and your iron gets warm, you know your circuit is sound. Congratulations...you can now plug into any convenient outlet and iron.


But before you actually start ironing, a few more quality-control tests. First, test your thermostat. Leave your iron on a warm setting for a few minutes, and make sure it stays merely warm. Now turn it up halfway, and determine that it heats up a bit and maintains that temperature. If you get runaway temperature, or it doesn't get any warmer, you may have to re-adjust your pivot screw. (And now you know where it is, and how to get to it!) 

Smoke! You may get some smoke coming out of the interior of the iron. Your first thought may be to panic, but not so fast. You've been handling the soleplate a lot, and it has been in contact with many foreign substances. It is probably just the oil from your hands burning off, and some flash-curing of the JBWeld we used. Still, keep an eye on it. Turn the thermostat down first, and see if the smoke lessens. If it does, wait for it to stop and then slowly and incrementally increase the thermostat. Fire is bad, obviously, and if the smoke starts really billowing you might have a problem that necessitates taking the iron back apart for a look inside.

Next, test out its steaming ability. Set the iron for steam, put a bit of water in the reservoir, and see if you get that slow, periodic hiss from the water dripping into the soleplate. Hold the iron off of the fabric and see that you get steam out of all the holes, then put it on the towel and make sure you get steam only out of the holes. Back pressure may force steam out of the box lid, or around the steam dome. In either case, the iron has to come apart again, in the one case, to examine the gasket seam and re-apply more JBWeld: you've missed a little, most likely hiding 'way underneath the wedge cam. In the other case, you need to make a little round gasket to fit underneath the steam dome. You may be tempted to live with it, but in the long run, taking it apart again and making sure you have chased down all the steam leaks will be the better path.

And finally, a check on the "conducted heat" factor. Yes, without the asbestos, the handle gets warm. The trim plate under the handle gets very warm. But for daily use, it's certainly tolerable. I wouldn't want to take on a marathon ironing session of every item in my wardrobe, without getting a bit of fiberglass insulation first. And I will, eventually. 

I hope this little project has opened your eyes a bit to the benefits of "going vintage." It's true; things WERE made better in years gone by. This elegant, chrome, improbably aerodynamic appliance is sturdier, heavier, and more robust than anything you can buy today, for a fraction of the price. It is, literally, "better than new." And it will still be working, long after a brand-new iron is in a landfill. Now I'm going to gift-wrap this baby, and put it under the Christmas tree.

Click here to go to the next essay chronologically.

Click here to go back to the previous essay chronologically, Part Three of Iron Man.

Click here to go back to Part One of Iron Man.

Click here to go back to the beginning.

Friday, November 30, 2012

Irons in the Fire

(Part 3 of the series, "Iron Man.")
Chapter 95
In this, the third part of what shall surely be known as the Great Iron Rebuild of 2012, we'll turn our attention to the refurbishment of the soleplate, complete the disassembly, and prepare for the final cleaning and reassembly next week of our venerable General Electric F50, which will then be ready for another half century of dependable service. 

As with any restoration project, (as anyone who has ever owned a classic car will tell you,) the only limit to perfection is how much time and money you want to spend. You can build a hundred-point concours d'elegance winner, or a just a driver to cruise around town. As we saw last week, the soleplate has some, well, issues: viz., the hex-head mounting screws are rusted in place, and the steam lid is warped. We've gone as far as electrolysis can take us. If I were truly inclined to make this perfect, there are tricks to use to get those screws out. I could soak the screws in penetrating oil for days, freeze the soleplate, then expand the metal around the screws with a butane minitorch. If all else failed, I could just drill out the screws and tap new threads. 

Regardless, the "pretty" way is to remove all the bits, take all the steel down to shiny metal, flatten the steam lid, polish all the aluminum to a smooth gloss, machine the mating surfaces, make a new gasket, and put in new stainless machine screws. It would look better than new and last for a hundred years...but you'd never know it was there. 

Well, we're not going to do that. We're making a runner. It'll look good on the outside, but everything "under the hood" will just be made to work, aesthetics be damned.

First, we'll patch the blown-out steam box gasket. For this, we will use the best metal bonding material known to man: JBWeld. If you're not familiar with it, it's a two-part high-temperature, high-stress epoxy. Before it cures, it's like thin putty. When it's dry, you can machine it like metal. The Kwik-Weld version here has a six minute working time, and cures in six hours. Get a wooden skewer, and something to mix on (I'm using tinfoil).

Dispense a small and equal amount from both tubes, and mix them together. The clock is now ticking...you only have a couple of minutes to work with it.

Using the pointy end of the skewer, pick up a bit of the putty, and roll it in along the gasket line with a pull-and-twist motion to the skewer. You'll probably get three or four inches along before the putty starts to cure. Just smooth it down in the crack and make up another small batch.

Don't forget the bit down inside, under the mounting plate. With a steady hand you can get the skewer in and roll the putty just where you want it.

The lid sealed, using just enough material to close and seal the gaps. After it cures, you can sand off the excess along the sides for a neater finish...but functionally, the steam box will now work like new and direct all the steam down...instead of up, out, in, and every direction except down.

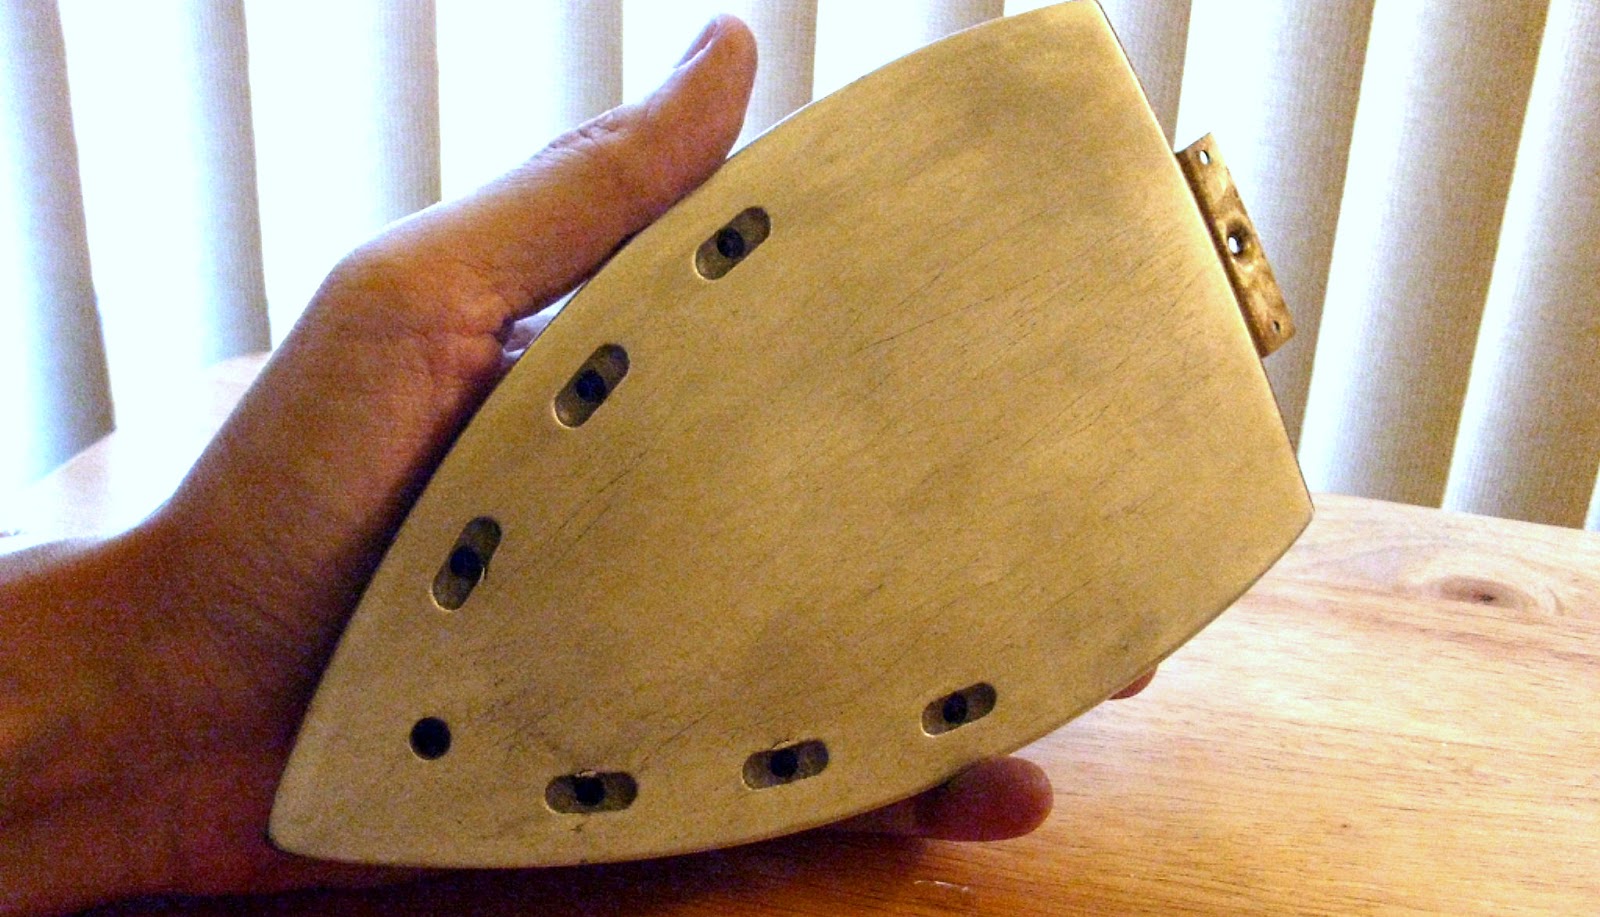
Now let's turn our attention to that sole. Ugly you will agree.

Here's where the elbow grease comes in. If you don't have an orbital sander of some sort, a sanding block will do the job -- eventually. Start coarse, say, 60 grit or so, and using longitudinal strokes, start shaving away. The sole is warped somewhat, and sanding against a flat block will get everything on the level -- again, eventually. (This is a slow and messy process. Black aluminum dust will get everywhere, so be warned.)

You can go as far as you want to with this. You can just take off the scorch and discoloration if you want. You can take it to the next stage and rub out the major scratches and knock down the high points. Or, you can spend a week, get it dead-level, and progress through finer grit paper until you are wet-sanding with 2000 grit and the sole is mirror-smooth. It's up to you. This pic is the tail-end of the knock-down stage. Minor scratches don't worry me, so I won't go much further than this point.

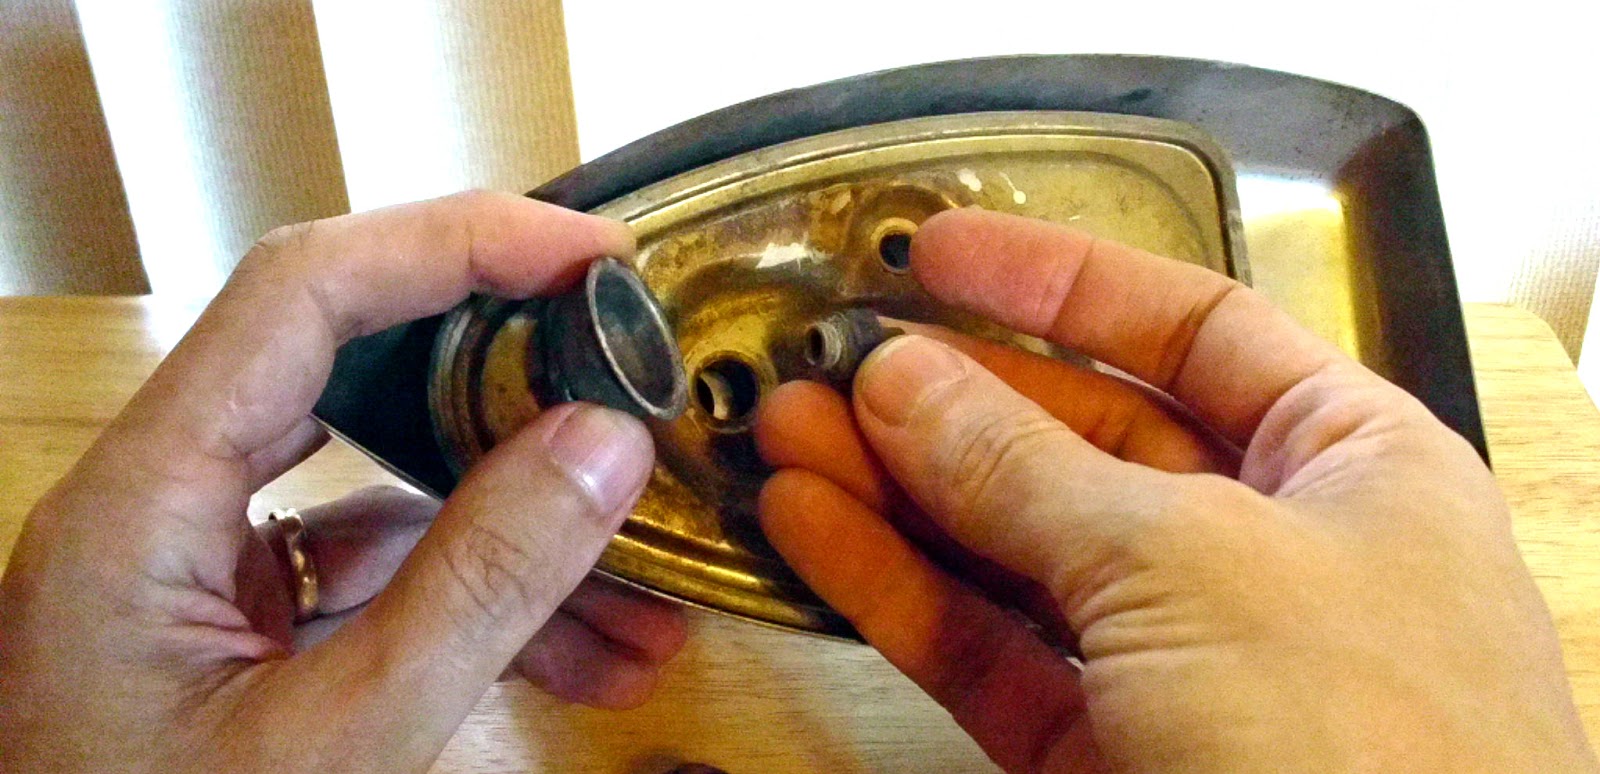
With the soleplate sorted out, let's turn our attention again to the top end of the iron. The only visible fastener is a hex fitting under the steam dome, so let's take that off.

The hex fitting, it turns out, is a plug with a small hole in it. The hole is stoppered with a needle up inside the reservoir. Releasing the steam button on top of the iron retracts the needle, permitting the water to drip slowly through the plug onto the soleplate, where it flashes into steam. The fitting also holds on the steam dome. The dome presses tightly down onto the hole in the steam box lid, preventing steam leakage.

There's no apparent visible way to remove the reservoir...but push lightly against the reservoir with one hand against what feels like spring pressure, and with the other hand, rock the fill funnel back and forth...

...until it works free. The fill funnel is the only thing holding the reservoir in place.

The reservoir pulls straight down out of the housing.

Now we see the source of that spring resistance: a spring ring at the bottom of the fill neck. It pulls right off. That spring insures that the steam dome presses firmly down against the soleplate once the housing is bolted in place.

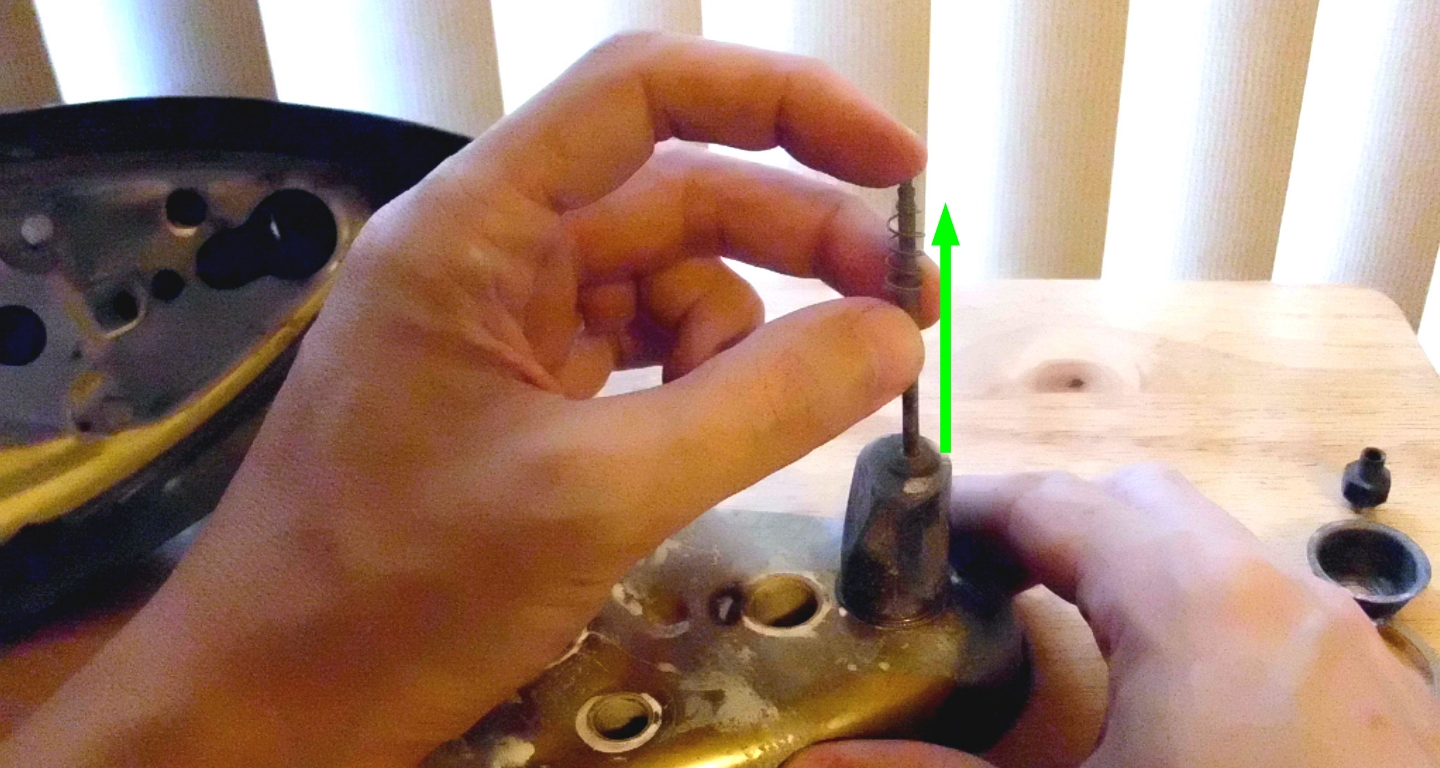
Pull the spring-loaded needle straight out of the fill neck.

Keep the needle safe, don't let it get damaged! It looks a bit like a gravity-feed carbureutor's needle and jet, but a more accurate parallel would be the stopper in a bathtub. It doesn't have to be a perfect fit to work.

With the reservoir out and stripped, test it for leaks. Fill it up and see if there's any seepage. If there is, and you're handy with a soldering iron, that's the "proper" way...or you can break out the JBWeld again and plug any pinholes.

Turning to the underside of the housing, the handle is held on by three hex-head screws. Remove those...

And the handle lifts right off.

Then, we can remove the controls. The thermostat lever is held on by a friction fit. Put your thumbs on either side of the handle like this, press down and slide forward...

...and the thermostat assembly slides right out of the handle.

The assembly is stacked as shown: lever on the bottom, setting display on top, with a spring plate sandwiched between. The spring plate holds the display in place, and gives some drag resistance to the lever.

And finally, the Big Red Button.With everything else out of the way, the button simply drops out of the handle.

And that's where we'll leave off this week: with the top half in bits, and the bottom half ready to go. Next week, we'll clean and detail the showy part, button everything back up, and take our new car --er, iron-- for a test drive!