Showing posts with label Ironing. Show all posts

Friday, December 7, 2012

Strike While the Iron's Hot

(Part 4 of the series, "Iron Man.")
Chapter 96
We've come at last to the end of our journey, and of our Iron Restoration Project. Over the past few weeks we've found a nice vintage iron, taken it apart, discovered what makes it tick, cleaned up the business end, and fixed fifty-odd years of entropy and misuse. This week, we'll turn our attention to the Shiny Bits, and turn back the clock on the exterior as well.

Here are all the exterior components laid out to view: essentially everything save the soleplate, reservoir, and fasteners. All except the cord are subject to a good cleaning: (all we can do with that is subject the plug and boot to an automotive-grade rubber protectant.) Before we turn to the scrubbing, though, we must separate mere dirt and grime from actual physical damage that needs to be repaired.

A good example of reparable damage: a dent on the switchplate. You can see it between the Rayon and Wool settings. This is fairly common on these irons: a sign that at some point it has taken a header off the ironing board and landed on its top-front edge.

The back side of the switchplate reveals the underside of the dent clearly. Fixing it is simple: just dent it backwards. It's an old auto body repair trick: determine exactly how the dent occurred (in this case, a sharp knock along the leading edge, that rolled the deformation out into a semicircular crescent shape,) and apply reverse pressure starting from the outer edge of the roll, and work in.

A wooden chopstick and light hammer work perfectly. Place the end of the stick just where you need it, hold the piece flat against a table, and give it a light rap. Move the stick slightly, and rap again. You'll pick up a rhythm, a tap every half second or so, before long. Work the ever-decreasing crescent inward, ending at the initial knock-point, then turn the switchplate on its end and straighten out the edge. Take it easily and methodically, and the dent will gradually disappear.

Now we're ready to use some more elbow grease. Best to use a shallow tub; you don't want to lose any parts down the sink drain! Put a few inches of hot water and a goodly amount of liquid degreasing detergent, and "borrow" a bristle brush.

Take the pieces one by one and give them a thorough scrubbing until the ages of accumulated crud lift away.

Another handy tip: a wet, wadded-up piece of aluminum foil works wonders on stainless steel, (and chrome, too.)

After all is thoroughly clean and dry, lay all your parts out together. Now is the time of truth and glory -- when everything comes back together!

First, drop in the steam button, remembering to keep the same orientation by which it was removed.

Assemble the three parts of the switchplate and thermostat knob, and slide them home. Hold the steam button up from the underside with one finger at first; then the switchplate will hold the button in place.

Next, screw the handle onto the housing.

Take the reservoir, hold the steam dome in place, and start screwing the plug in by hand. Snug it with your wrench.

Put the spring ring on the fill neck, and slide the stopper rod in place.

Hold the reservoir up into the housing, and press the fill funnel into the hole in the fill neck. 

So far, so good -- but now comes the tricky part! The cam turner has to engage between the thermostat knob and the wedge cam, and it has to be done blind: you can't see what the turner's doing when you put the soleplate on. Here's the best way to improve your chances of success. Sight up through the hole in the reservoir until you can see the light shining through the slot in the thermostat lever. That gives you a target to aim for...


...when you drop the cam turner in. Notice that one end is offset and "points" to the knob. 


The next thing one would do is cut an asbestos mat the size of the reservoir, cut out all the necessary access holes, and lay it in place. Only one problem with that -- you can't get asbestos any more. It's a wonderful non-conductive insulating material that repels heat. Unfortunately, it also releases tiny airborne fibers that get stuck in your lungs and cause cancer. Thermal-insulating fiberglass mat may be the best alternative...but I don't have any on-hand. Before I go out and buy some, I'm going to assemble it sans insulation and test it that way, to see if it's really needed. 


But now back to the cam-turner. Turn the thermostat to the halfway position, so the turner is oriented fore-and-aft.


Then turn the wedge cam 90° so that its slot matches the turner.

Now, carefully lower the soleplate onto the housing. Notice that the cam turner comes in at an angle, so lower the back end of the soleplate first, line up the slot, and lower into place. Check to be sure the turner is engaged by moving the thermostat lever and putting your ear at the baseplate: if you hear the follower sliding along the cam, and the thermostat moves with a little resistance, you got it right. If not, try it again. Be patient; it may take a couple tries.

Turn the iron over, and press firmly on the front of the housing to seat the steam dome into the soleplate. Start the two attaching nuts by hand, and snug them up with your wrench. Then put the trim plate back in place.

Now attach the cord: line up the spade connectors, route the wires as they were originally, and gently snug the screws. Finally, with great ceremony, screw the hatch in place.

We're almost done! All that's left is the final testing. Get out your ironing board and something to iron, a fluffy towel, for instance. Safety first: plug into a GFCI outlet in case of a catastrophic failure...and turn your new iron on its lowest setting. If the GFCI breaker doesn't trip, (or, if you don't have one, if your house fuse doesn't blow!) and your iron gets warm, you know your circuit is sound. Congratulations...you can now plug into any convenient outlet and iron.


But before you actually start ironing, a few more quality-control tests. First, test your thermostat. Leave your iron on a warm setting for a few minutes, and make sure it stays merely warm. Now turn it up halfway, and determine that it heats up a bit and maintains that temperature. If you get runaway temperature, or it doesn't get any warmer, you may have to re-adjust your pivot screw. (And now you know where it is, and how to get to it!) 

Smoke! You may get some smoke coming out of the interior of the iron. Your first thought may be to panic, but not so fast. You've been handling the soleplate a lot, and it has been in contact with many foreign substances. It is probably just the oil from your hands burning off, and some flash-curing of the JBWeld we used. Still, keep an eye on it. Turn the thermostat down first, and see if the smoke lessens. If it does, wait for it to stop and then slowly and incrementally increase the thermostat. Fire is bad, obviously, and if the smoke starts really billowing you might have a problem that necessitates taking the iron back apart for a look inside.

Next, test out its steaming ability. Set the iron for steam, put a bit of water in the reservoir, and see if you get that slow, periodic hiss from the water dripping into the soleplate. Hold the iron off of the fabric and see that you get steam out of all the holes, then put it on the towel and make sure you get steam only out of the holes. Back pressure may force steam out of the box lid, or around the steam dome. In either case, the iron has to come apart again, in the one case, to examine the gasket seam and re-apply more JBWeld: you've missed a little, most likely hiding 'way underneath the wedge cam. In the other case, you need to make a little round gasket to fit underneath the steam dome. You may be tempted to live with it, but in the long run, taking it apart again and making sure you have chased down all the steam leaks will be the better path.

And finally, a check on the "conducted heat" factor. Yes, without the asbestos, the handle gets warm. The trim plate under the handle gets very warm. But for daily use, it's certainly tolerable. I wouldn't want to take on a marathon ironing session of every item in my wardrobe, without getting a bit of fiberglass insulation first. And I will, eventually. 

I hope this little project has opened your eyes a bit to the benefits of "going vintage." It's true; things WERE made better in years gone by. This elegant, chrome, improbably aerodynamic appliance is sturdier, heavier, and more robust than anything you can buy today, for a fraction of the price. It is, literally, "better than new." And it will still be working, long after a brand-new iron is in a landfill. Now I'm going to gift-wrap this baby, and put it under the Christmas tree.

Click here to go to the next essay chronologically.

Click here to go back to the previous essay chronologically, Part Three of Iron Man.

Click here to go back to Part One of Iron Man.

Click here to go back to the beginning.

Friday, November 30, 2012

Irons in the Fire

(Part 3 of the series, "Iron Man.")
Chapter 95
In this, the third part of what shall surely be known as the Great Iron Rebuild of 2012, we'll turn our attention to the refurbishment of the soleplate, complete the disassembly, and prepare for the final cleaning and reassembly next week of our venerable General Electric F50, which will then be ready for another half century of dependable service. 

As with any restoration project, (as anyone who has ever owned a classic car will tell you,) the only limit to perfection is how much time and money you want to spend. You can build a hundred-point concours d'elegance winner, or a just a driver to cruise around town. As we saw last week, the soleplate has some, well, issues: viz., the hex-head mounting screws are rusted in place, and the steam lid is warped. We've gone as far as electrolysis can take us. If I were truly inclined to make this perfect, there are tricks to use to get those screws out. I could soak the screws in penetrating oil for days, freeze the soleplate, then expand the metal around the screws with a butane minitorch. If all else failed, I could just drill out the screws and tap new threads. 

Regardless, the "pretty" way is to remove all the bits, take all the steel down to shiny metal, flatten the steam lid, polish all the aluminum to a smooth gloss, machine the mating surfaces, make a new gasket, and put in new stainless machine screws. It would look better than new and last for a hundred years...but you'd never know it was there. 

Well, we're not going to do that. We're making a runner. It'll look good on the outside, but everything "under the hood" will just be made to work, aesthetics be damned.

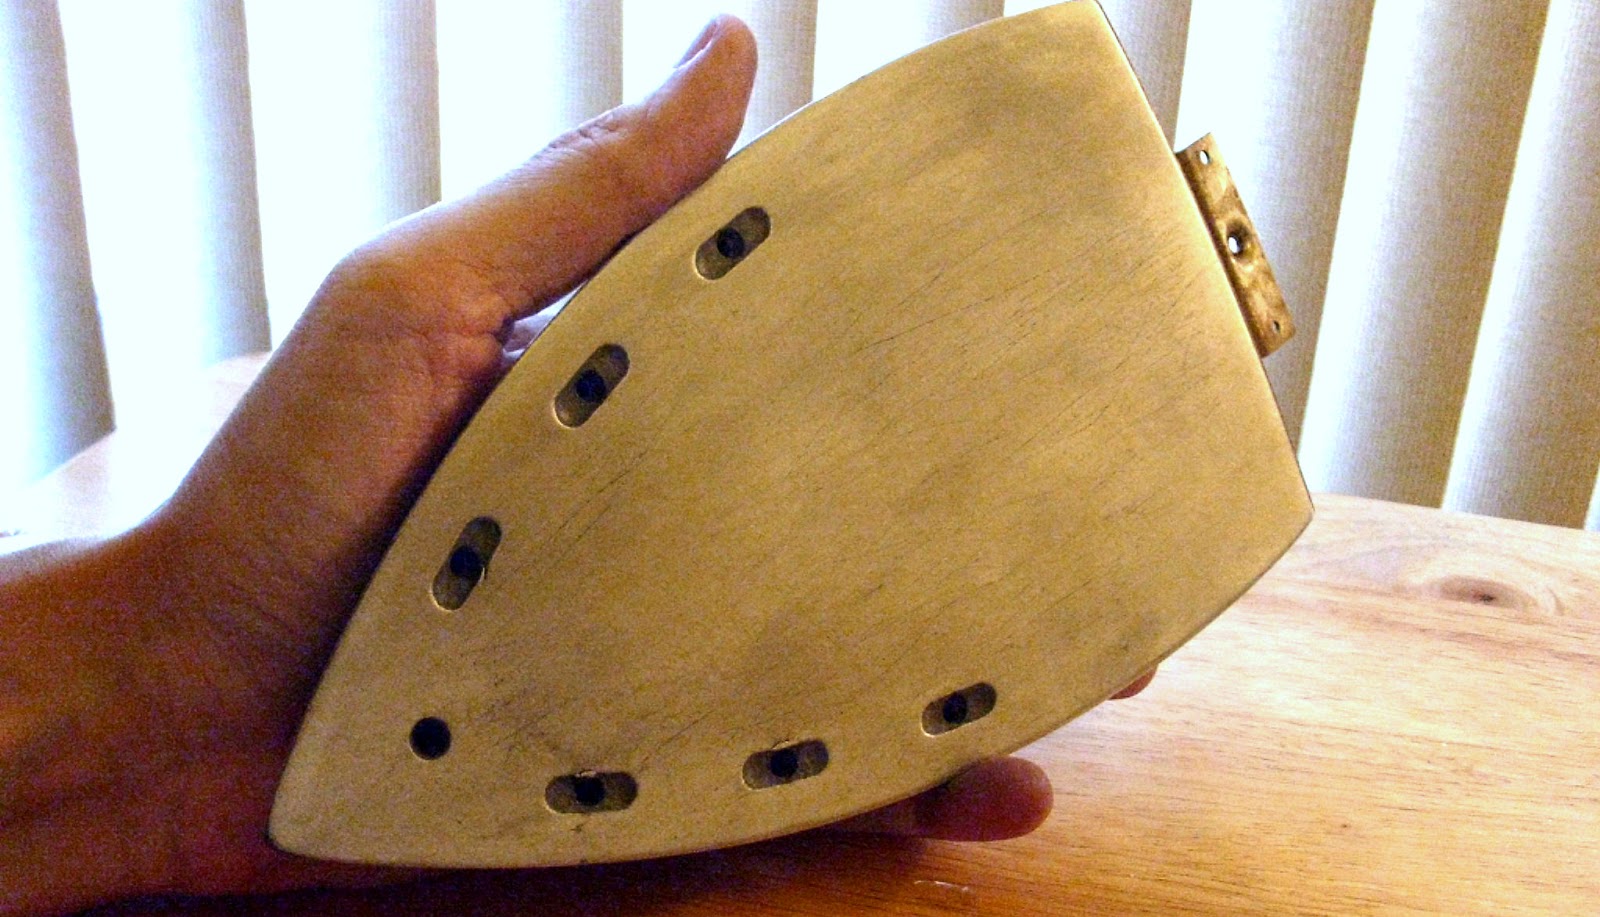
First, we'll patch the blown-out steam box gasket. For this, we will use the best metal bonding material known to man: JBWeld. If you're not familiar with it, it's a two-part high-temperature, high-stress epoxy. Before it cures, it's like thin putty. When it's dry, you can machine it like metal. The Kwik-Weld version here has a six minute working time, and cures in six hours. Get a wooden skewer, and something to mix on (I'm using tinfoil).

Dispense a small and equal amount from both tubes, and mix them together. The clock is now ticking...you only have a couple of minutes to work with it.

Using the pointy end of the skewer, pick up a bit of the putty, and roll it in along the gasket line with a pull-and-twist motion to the skewer. You'll probably get three or four inches along before the putty starts to cure. Just smooth it down in the crack and make up another small batch.

Don't forget the bit down inside, under the mounting plate. With a steady hand you can get the skewer in and roll the putty just where you want it.

The lid sealed, using just enough material to close and seal the gaps. After it cures, you can sand off the excess along the sides for a neater finish...but functionally, the steam box will now work like new and direct all the steam down...instead of up, out, in, and every direction except down.

Now let's turn our attention to that sole. Ugly you will agree.

Here's where the elbow grease comes in. If you don't have an orbital sander of some sort, a sanding block will do the job -- eventually. Start coarse, say, 60 grit or so, and using longitudinal strokes, start shaving away. The sole is warped somewhat, and sanding against a flat block will get everything on the level -- again, eventually. (This is a slow and messy process. Black aluminum dust will get everywhere, so be warned.)

You can go as far as you want to with this. You can just take off the scorch and discoloration if you want. You can take it to the next stage and rub out the major scratches and knock down the high points. Or, you can spend a week, get it dead-level, and progress through finer grit paper until you are wet-sanding with 2000 grit and the sole is mirror-smooth. It's up to you. This pic is the tail-end of the knock-down stage. Minor scratches don't worry me, so I won't go much further than this point.

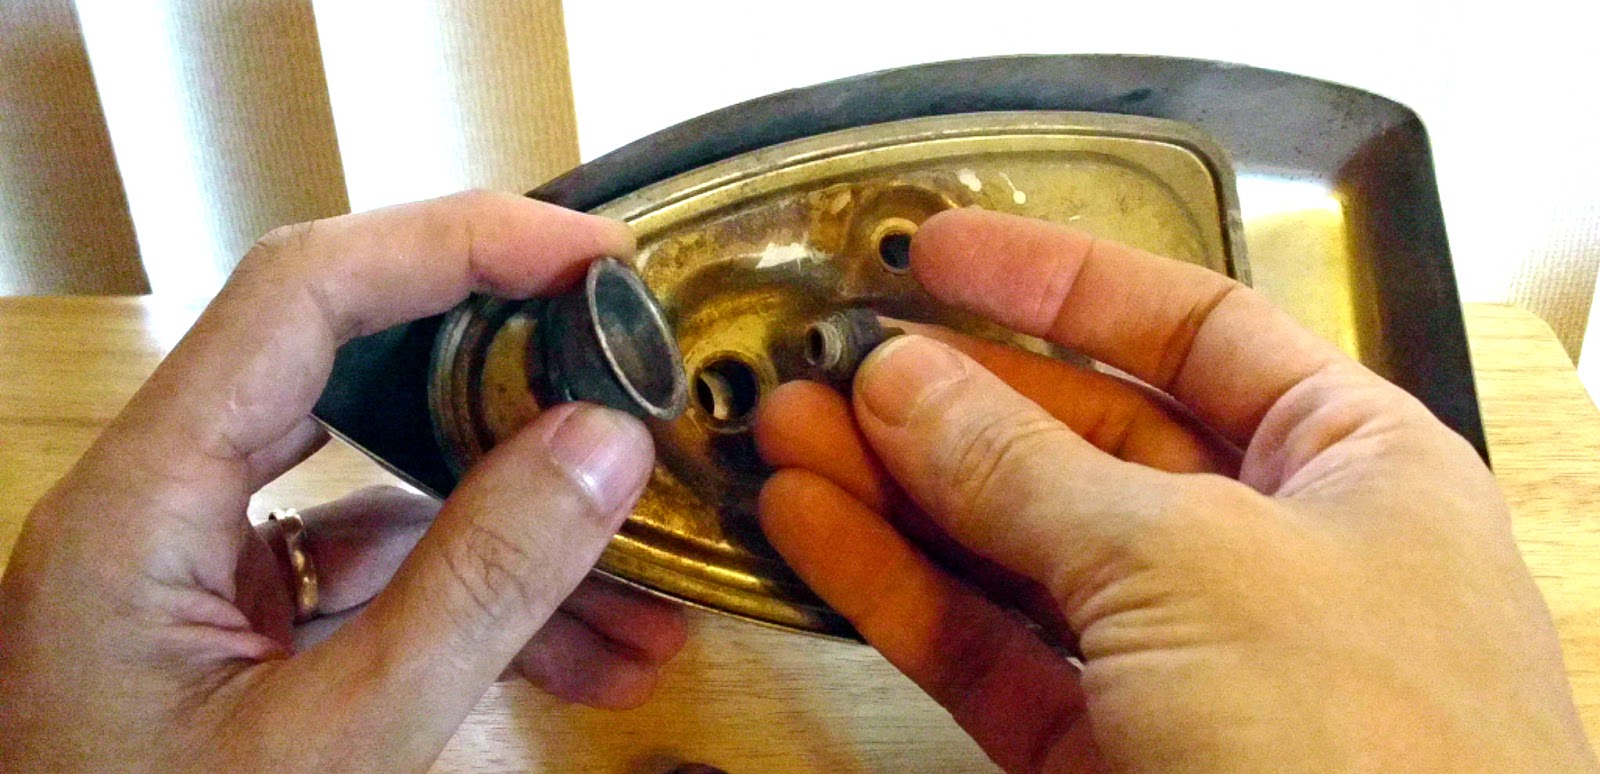
With the soleplate sorted out, let's turn our attention again to the top end of the iron. The only visible fastener is a hex fitting under the steam dome, so let's take that off.

The hex fitting, it turns out, is a plug with a small hole in it. The hole is stoppered with a needle up inside the reservoir. Releasing the steam button on top of the iron retracts the needle, permitting the water to drip slowly through the plug onto the soleplate, where it flashes into steam. The fitting also holds on the steam dome. The dome presses tightly down onto the hole in the steam box lid, preventing steam leakage.

There's no apparent visible way to remove the reservoir...but push lightly against the reservoir with one hand against what feels like spring pressure, and with the other hand, rock the fill funnel back and forth...

...until it works free. The fill funnel is the only thing holding the reservoir in place.

The reservoir pulls straight down out of the housing.

Now we see the source of that spring resistance: a spring ring at the bottom of the fill neck. It pulls right off. That spring insures that the steam dome presses firmly down against the soleplate once the housing is bolted in place.

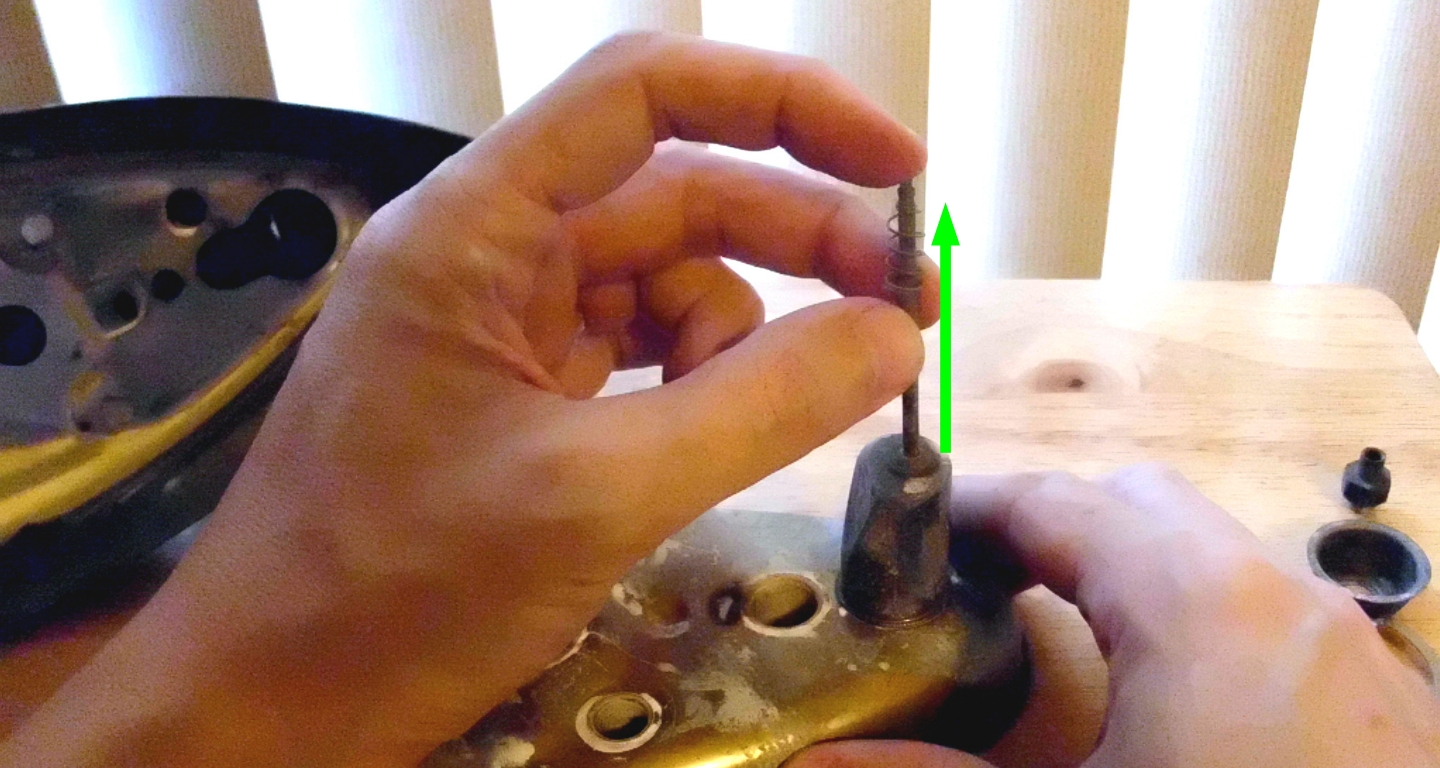
Pull the spring-loaded needle straight out of the fill neck.

Keep the needle safe, don't let it get damaged! It looks a bit like a gravity-feed carbureutor's needle and jet, but a more accurate parallel would be the stopper in a bathtub. It doesn't have to be a perfect fit to work.

With the reservoir out and stripped, test it for leaks. Fill it up and see if there's any seepage. If there is, and you're handy with a soldering iron, that's the "proper" way...or you can break out the JBWeld again and plug any pinholes.

Turning to the underside of the housing, the handle is held on by three hex-head screws. Remove those...

And the handle lifts right off.

Then, we can remove the controls. The thermostat lever is held on by a friction fit. Put your thumbs on either side of the handle like this, press down and slide forward...

...and the thermostat assembly slides right out of the handle.

The assembly is stacked as shown: lever on the bottom, setting display on top, with a spring plate sandwiched between. The spring plate holds the display in place, and gives some drag resistance to the lever.

And finally, the Big Red Button.With everything else out of the way, the button simply drops out of the handle.

And that's where we'll leave off this week: with the top half in bits, and the bottom half ready to go. Next week, we'll clean and detail the showy part, button everything back up, and take our new car --er, iron-- for a test drive!


Friday, November 23, 2012

Ion Iron

(Part 2 of the series, "Iron Man.") 
Chapter 94
This week continues our mini-series detailing my little holiday project: the inspection and restoration of an early '50s vintage model F50 General Electric steam iron. When we're done, we'll hopefully have brought a world-class shirtpresser back from oblivion, and ready for another lifetime of service.

Last week, we'd gotten the soleplate off, with its electric components, and figured out how said components work. The steel parts are all very rusty, and any attempt to remove them from the aluminum base is fruitless. We'll try to remove the rust somehow, and the easiest way to remove rust from parts that are rusted together, is electrolysis

Rust is the oxidation of metal -- a natural electrical process that can thus be reversed by artificial means. Basically, if the rust is negatively charged, (in other words, ionized,) and the rusty item is submerged in an electrolyte with a positive electric source, then the rusty ions will boil off the negative side and be attracted to the positive side. It's the same theory as with a vacuum tube, or an electric battery cell.

What we need to do first is to assemble a non-conductive container, an anode, some wire, the electrolyte, and a voltage source. Fortunately, all of these things can be made with simple household items. 

The container is simple enough -- a plastic office trash can can be used as a bucket. 

Next, we need a sacrificial anode, something made of iron or steel. The simplest and easiest anode is a simple tin can, cut apart and spread out like this, to expose the largest amount of surface area. Don't use anything stainless steel for the anode: the process will pull the chrome out of the stainless in the form of tiny amounts of chromium trioxide. It's very, very toxic. 

We need a hanging wire, to suspend the parts in the bucket, and attach the electric leads. A wire clothes hanger is perfect for this. Straighten it out with a pair of pliers, and bend it to shape. Suspend the anode inside the bucket, about an inch off of the bottom, like this.

Check the continuity from the end of the wire through the can, to make sure the electricity will flow...

...then bend a wire to suspend the soleplate inside the bucket. You want the entire surface and all the components to be electrically charged, so hang it from two points: one on the thermostat side and other on the base side. Use the continuity tester to make sure all points of the iron are continuous through the wire.

Next, we need to make the electrolyte. The best (and safest) electrolyte for the process is sodium carbonate, also called soda ash, washing powder, or Na2CO3. If you don't have sodium carbonate washing powder, don't fret: there is an easier solution. Baking soda is sodium hydrogen carbonate, also called bicarbonate of soda, or NaHCO3, which is a little less effective, but still usable. Better yet, take a quarter-cup or so of baking soda, scatter it on a cookie sheet, and bake it for an hour at 300° F. The heat releases water vapor and carbon dioxide from the sodium bicarbonate, and you're left with soda ash. If you remember your high-school chemistry, what you're dong is 2 NaHCO3(s) = Na2CO3(s) + H2O(g) + CO2(g). Voila, you've just made sodium carbonate!

Dissolve your newly-made soda ash in warm water, and submerge the soleplate completely. Now you're ready for the application of mass quantities of free electrons.

If you have an automotive battery charger, you're all set. This one is user-selectable to push 10 amps of direct current at either 6 or 12 volts. (This is another vintage item of mine; it's been ready to keep my batteries charged since the 1970s.) Newer chargers, with computerized innards that are designed to detect the battery's state of charge and modulate its voltage output for optimum charging, may not let you "repurpose" it the way we plan to do...

...which is this! Hook up the charger's clamps to the wires, outside the bucket. Remember the negative side is the cathode, (the iron's soleplate,) and the positive side is the anode, (the tin can,) since the goal is to move the negatively-charged iron oxide anions off the cathode onto the anode. Hooking it up backwards will run the process backwards, so make sure you have it the right way 'round.

Turn on the charger; start at six volts. You should soon start to see bubbles rising from the cathode, and the froth on top will start circulating around the anode. Rusty scum will float to the surface, heavier particles will collect in the bottom of the bucket.

Safety warning -- keep the charger well separated from the bucket. You're playing with electricity, so keep your hands out of the water. Do this in a well-ventilated area, or preferably even outdoors: electricity also cracks water into hydrogen and oxygen, so you want no stray sparks. Needless to say, turn off the charger before you remove the clamps. Better safe than exploded. 

Check the mix every twenty minutes. Strain the scum off, rinse off the anode (it will accumulate scum as well,) pour the electrolyte into a second bucket and discard the rusty buildup at the bottom. Add extra water as needed; you don't need to replenish the soda ash as it doesn't get used up. Electrolysis is largely a line-of-sight process, so turn around the soleplate to face the bottom toward the anode every other cycle, as shown here. 

If this were a solid chunk of iron, we could leave it boiling for days; when all the rust is gone the reaction stops. Since we have a chunk of aluminum in the mix, we have to be a little more observant -- the aluminum will keep boiling off without end. ("Boiling" in the sense of boiling off ions from the metal. The water may get warm, but it will not reach an actual thermal boil.)

After several hours of boiling in 20-minute segments like this, I noticed that the topside of the plate was not getting as clean as the rest of the plate. I checked the ohms again, and found that the top plate had lost continuity. This necessitated a shift in the wire, hooking it 'round the top plate until all points of the iron were again continuous. It's important to inspect your work every so often for this reason: if any part isn't getting electricity, it won't shed its oxidation.

As the anode collects rust, it will pass less electricity, and the amps will fall. This is the tin can after just a couple of hours. Keep an eye on the cathode -- when the bubbles start slowing to a trickle, bump the charger to 12 volts to keep things vigorous. When even that doesn't work, you might need to replace your tin can.

A sure sign that the rust is still falling off is thick yellow scum at the top of the bucket. Keep an eye on this as well. There will come a point when the yellow scum will stop in favor of grey scum. At that point, the steel de-rusting has stopped and the aluminum is boiling off. There may still be black rust on the steel parts, but the aluminum has become the easier reaction. There's nothing you can do at this point but keep a careful watch on the aluminum -- let it go too long, and it will start to pit and degrade!

How long to let the process go is a matter of judgement. I stopped after about four and a half hours of total boil-time. There's still a bit of black rust on the mounting plate and leads, but closer inspection shows that the loose rust and scale are gone. The aluminum is largely clean, but I daren't go any further for fear of pitting and degrading the base. When you've decided electrolysis time is over, rinse off the soleplate thoroughly, and dry it immediately under a hairdryer to prevent anything flash-rusting again. Dump out the water (there's nothing toxic there: just rusty water and washing powder,) and clean up -- you're done!

Now we can get a closer look at the soleplate, and do a bit of sleuthing. The reason this iron was donated to the secondhand store is becoming clear: it had at some point badly overheated. Perhaps the pivot got out of adjustment, most likely through the mounting arm becoming weak over time through innumerable heatings. Eventually, the thermostat was unable to cycle on and off: the pivot would simply give with the flexing of the bimetallic strip, and the iron was full-on all the time -- even when it was turned off.

The triangular steam box lid, held on by seven screws, and insulated with a steam-tight gasket, warped badly in the excessive heat. So badly, it sheared the head off of the foremost screw, and cracked the lid at the left-front screw. The pressure created by the warped steam lid on the point of the sole cracked it at the button slots as well, just adjacent to the steam outlets; (but these are hairline cracks that don't extend all the way through the base.)

The damage was probably caused slowly, and the iron used for a time in this condition, but the steam wore through the gaskets, and blew out and inside the body of the iron, rather than down through the sole. This caused the excessive rusting of the mounting plate just behind the steam lid, and deteriorated away the asbestos insulation. So from the original owner's point of view, the iron stayed on high and wouldn't steam well, and limped along until it was thrown out. Alas, a simple adjustment of an eighth of a turn on one screw would have prevented this.

Too bad for her, great for me...for this is very fixable. And next week, we will fix it, and get on with the project of restoration. Stay tuned!

Click here to go to the next essay chronologically,  Part Three of Iron Man.

Click here to go back to the previous essay chronologically, Part One of Iron Man.

Click here to go back to the beginning.